Showing posts with label birthday party. Show all posts

Friday, 13 January 2023

Birthday card with Celebrate die set by Tim Holtz

This card was made for my daughter. She turns 17 on next Monday. Before I made the card I asked her about her favourite colours and she said light green and pink. So here it is:


For the background, I took a pastel green paper and stamped on it with the Dots background stamp using embossing ink. Then I heat embossed with white embossing powder. I cut off the excess and inked the edges with Rustic Wilderness.


All the cutouts were in the Celebrate die set, except the numbers and the text. 

What I used:

Sizzix Thinlits die, Celebrate Colorize (666285)

Sizzix Thinlits die, Alphanumeric 3/4" (660056)

Sizzix Thinlits die, Handwritten Celebrate (660215)

Stampers Anonymous, Dots and Floral (CMS220)

coloured paper

Ranger embossing powder (super fine white)


Tuesday, 10 January 2023

Twig and Stump having a birthday party

Three very important women in my life have birthdays in January, and they are all January Capricorns (if you believe in astrology). My favourite grandmother was born on January 7 (yes, that's Tim's birthday too), my sister on January 11 and my daughter on January 16. Sadly, my grandmother is no longer with us, but I still have to special someone to make birthday cards for. This card is for my sister.


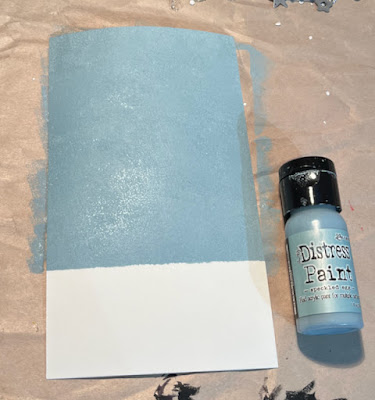
I cut out a rectangle panel from 300 gsm watercolour paper. I painted the top two thirds blue with Speckled Egg. I didn't paint the bottom white, I just left it as it was, because it was easier to stamp the text on. I inked the edges with Hickory Smoke Archival ink, I also added Ground Espresso to the upper part. 


I used coloured paper for all my cutouts, and depending on how dark the paper was I used lighter or darker ink for the edges. So I used Pumice Stone and Vintage Photo. Pumice Stone is for the white papers mostly. 


The text was stamped with embossing ink and heat embossed with black embossing powder.


What I used:

Sizzix Thinlits die, Twig&Stump (666072)

Sizzix Thinlits die, Bunny Games (665850)

Sizzix Sidekick Side-Order die, Birthday (662703)

Stampers Anonymous, Tiny Text (CMS394)

Ranger Distress paint (Speckled Egg)

Ranger Distress ink (Hickory Smoke, Vintage Photo, Tumbled Glass)

Ranger Distress Archival ink (Hickory Smoke, Ground Espresso)

embossing powder (black)

tiny half pearls

etc.


Sunday, 1 January 2023

Gladys wants to party

Happy New Year everyone!!! I hope 2023 will be your best year! 

It's not just the first day of a new year but a new month, so we started a new challenge over at the Country View Challenges. The theme is Time and my lovely teamie, Evelyn will be your hostess.

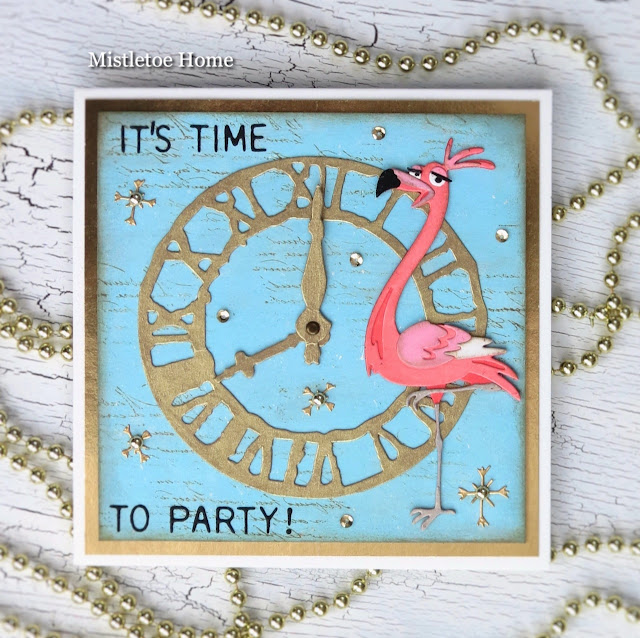
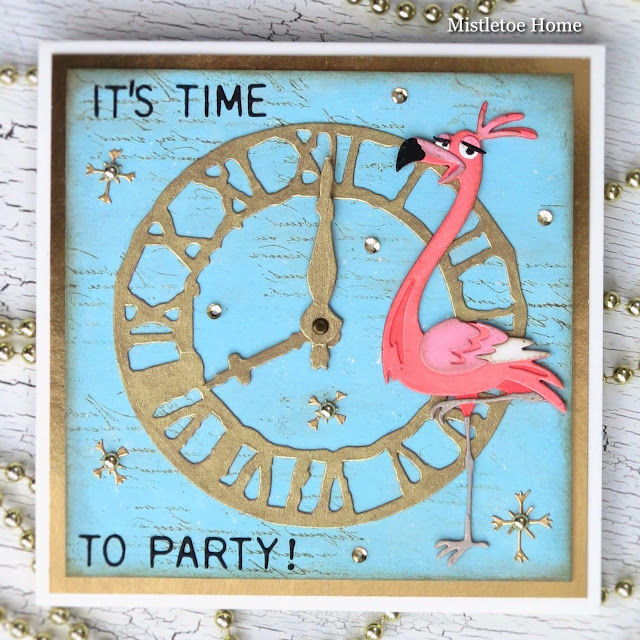
For this challenge I created a card that can be used for any celebration, new year, birthday, whatever. I chose Gladys as the main character because she seems a real party animal for me. She looks so cheerful. 


I cut out a square panel and painted blue - I'm sorry, I have no idea which paint I chose from DecoArt. Then I stamped the text (Reflections) here and there with Vintage Photo Archival ink. I toned back the blue paint and the text with white paint. I also spattered the background with white paint. When it was dry, I added diluted Pumice Stone here and there too. The edge was inked with Hickory Smoke Archival ink first, then I added a little Grounded Espresso. 

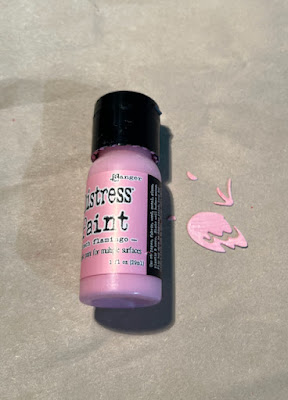
Gladys was coloured with the following colours: Abandoned Coral, Saltwater Taffy, Kitsch Flamingo, Black Soot, Pumice Stone.


The clock was coloured gold with Schmincke Rich Gold paint. For the snowflakes and the gold underlayer panel, I used Metallic Kraft paper. 


What I used:

Sizzix Bigz die, Weathered Clock (657190)

Sizzix Thinlits die, Gladys Colorize (665851)

Sizzix Thinlits die, Cozy Winter (665574)

Sizzix Thinlits die, Alphanumeric Label (664177)

Stampers Anonymous, Reflections (CMS111)

Idea-Ology, Metallic Droplets (TH94289)

Idea-Ology, Metallic Kraft-Stock (TH93586)

Nuvo, Light Gold, Pure Sheen Sequins

Ranger Distress Archival inks (Vintage Photo, Ground Espresso, Hickory Smoke)

Ranger Distress paints (Abandoned Coral, Kitsch Flamingo, Saltwater Taffy, Pumice Stone, Black Soot, Picket Fence)

etc.


So if you have a project with Time, please don't hesitate to join our January challenge where a randomly selected winner can have a £20 voucher in the Country View Craft Shop.


With my card, I would like to join the Simon Says Stamp Monday Challenge: Party Time!


Monday, 11 July 2022

MFT Picture Perfect Party Animals - birthday card with hippos

And here is the last card that I made with the Picture Perfect Party Animals stamp set by MFT. In the last few days I have shown you 6 cards that I have made with this set. And you will find the tutorial in the blog post of the first card.


Here are the links for all the cards with this set: parrots, monkey, lion, elephant and giraffe.

And a close-up with the happy hippos.


Tuesday, 5 July 2022

Picture Perfect Party Animals by MFT Stamps

I'm here again with the two more cards that I made with Picture Perfect Party Animals stamp set by MFT. If you want to know how I made these cards, please click on my first card where you can find a tutorial. Here I showcase the adorable elephant and the lovely giraffe. 


For the background of this card, I used the Festive Berries Distress ink and the text is from Sassy Pants Birthday Greetings stamp set.


Here I used Ranger Blueprint Sketch Distress ink for the background and Patty Time stamp set by Stacey Yacula.

And the close-up pictures:


Now there's just one more to come!


Saturday, 2 July 2022

Birthday card with MFT Picture Perfect Party Animals

Hello everyone, I'm here with the third card that I made with the Picture Perfect Party Animals stamp set by MFT. This time I would like to show the greedy lion.


In my earlier post, I've already explained how I made a card like this. So here I won't repeat myself. The only difference is that here I used Pine Needles Distress ink for colouring the background. The text is from another set, MFT Pawty Time by Stacey Yacula .


Three more cards to come :-)


Wednesday, 29 June 2022

Birthday card with Picture Perfect Party Animals stamp set by MFT

Hello everyone, here is my second card that I made with the Perfect Picture Party Animals stamp set. For this card, I used exactly the same technique and design that I used for  my previous card, where you can also find the tutorial.


The only difference is the text, because here I used the Sassy Pants Birthday Greetings stamp set by MFT. And the I blended onto the background paper was Twisted Citron Distress ink.


Monday, 27 June 2022

Birthday card with parrots

Hello everyone, I'm here with a cheerful birthday card that I made with one of the stamps of MFT Birdie Brown Picture Perfect Party Animals set. Since I did a lot of colouring during the weekend more card will come here, to my blog.


Well, I coloured all the images with Copic Sketch markers and stamped with Tsukineko Memento Tuxedo Black ink.


I cut out little bit bigger squares than my coloured pictures. For this, I used one of the square die from MFT Square Stax Die-Namics set.

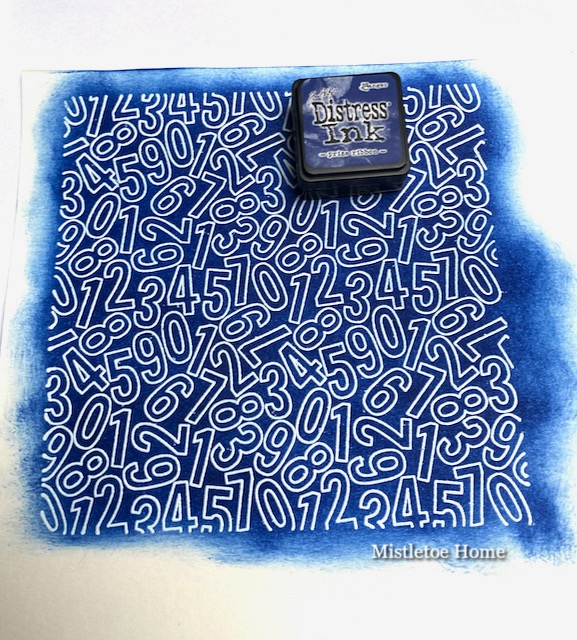
I stamped the Number Jumble background stamp on a white paper with Versamark embossing ink, then I heat embossed with Ranger Super Fine White embossing powder. In the end, I blended Prize Ribbon ink onto the whole surface.


I stamped the text with Tuxedo Black ink and you can find it in the same Birdie Brown stamp set.


I hope you like it! Thank you for stopping by!


Friday, 5 June 2020

Feminine birthday banner

Lately, I was a little busy with a big project, which took a few days. My friend who celebrates her birthday at the beginning of June asked me to make her a birthday banner.

After questioning her about the details, I decided to make it in Hungarian. Therefore I had to do 16 banners to make out the BOLGOG SZÜLINAPOT greeting. 

To begin, I cut out 16 banners from white cardstock with the Sizzix Framelits Plus die, Banners. I needed this die set because my banners are quite big. Then I painted gold on both sides. I had to do this since the gold papers are very expensive and I needed plenty. For this, I used the DecoArt Glorious Gold colour.

Then I cut out the one size smaller banners from pattern papers. For this, I used the First Edition floral paper pads, like Floral Pavilion, Pretty Posy, Bella Rose. Unfortunately, all of them are discontinued.

The letters were cut out from gold papers with the Sizzix Bigz die, Sassy Serif Letters.

The only photo I could make about my banner was the one to ask my friend which colour raffia twine she wanted for her banner.


I hope she will take some pictures when she installs this in her garden. And if so, I will show you more pictures of my banner.

And here are the promised pictures:


Sunday, 17 May 2020

Ladies at a birthday party

Hello crafty friends, I'm here with the second inspirational post for the May challenge of the Country View Challenges, called Tea Party but you can do projects with Birthday Party or any Anniversary Party.

Here is mine with a birthday party this time.


And here is my tutorial.

I made a folded card from a light cream cardstock, then I adhered a dark brown panel on it.  Now here comes the creative part.

I took a paper from the Menagerie 8x8" Paper Stash and blended Spun Sugar ink onto the surface. Then inked the edges with Gathered Twigs ink.


Then I took a 300gsm watercolour paper and stamped, then heat embossed with the Lattice background stamp from the Lattice&Flourish stamp set (CMS257). For this, I used the Princess Gold embossing powder.

Then I blended the surface with diluted Antique Linen ink. This is why I needed a watercolour paper. Here I inked the edges with Gathered Twigs as well.


The ladies were in one of the Paper Dolls set and I coloured with Distress Crayons. For this technique, you can find a perfect tutorial at Paula Cheney, I followed her rules too.

The hat was stamped with Hickory Smoke Archival ink and coloured with Distress markers (Spun Sugar, Squeezed Lemonade) and you can find the actual stamp in the Mini Crazy Birds&Things stamp set. In the end, I sealed them with Distress Resist Spray. For this, I spritzed a little amount of Resist Medium onto a plastic sheet, then I tapped them onto the surface with a piece of sponge. 


The text was in the Metallic Stickers Quotations set and I placed a piece of gold paper from the Metallic Kraft Paper Stash.

The flowers were made earlier. But I'm sure, I used the Tiny Tattered Florals for the white part and the Small Tattered Florals for the blue part. I also used the latter die set for the leaves. I added a little gold paint to the edges for making them more elegant. I put a tiny pearl in the middle of my flower.

I used the same gold paint to colour the thin Star Trim paper.


If you have a project related to our May theme, please don't hesitate to join us where you can win a £20 voucher.


Monday, 6 February 2017

Winter themed birthday party - Banner

Let me show you the banner what I made for Eszter's birthday party. It was a winter themed birthday party because she is a January girl and this is why it was not the first time when she chose winter colours and snowflakes for her birthday party. 

Unfortunately the light (or the lack of the light) didn't help me to take a proper photo of a nearly 200 centimetres banner. 


What I used:


Sizzix Bigz Alphabet Die, Sassy Serif Letters


Silver Pearls

Tim Holtz Idea-Ology, Tinsel Twine

Silver Glitter Paper


And here is a close up to see the details.


Sunday, 5 February 2017

Winter birthday party - treat boxes

It was Eszter's birthday party this Saturday. For her guests I prepared treat boxes. And since it was a winter themed party I decorated the boxes with snowflakes.


I used the Box Framelits Die I got for the Sizzix Big Shot Plus Starter Kit


With one of the Square Framelits Dies (657565), I cut out the covers for the boxes.


For the covers I used the First Edition Silent Night Papers (8x8) but some of them were stamped with snowflake stamps.


I used two snowflake stamps:


Hero Arts, Snowflakes by Lia Griffith (CL901)


I cut out the big snowflakes on the top with Sizzix Thinlits Die, Mini Paper Snowflakes by Tim Holtz (661599) from silver glitter paper.


I glued rhinestone in the middle of each one.


I could put quite a lot of candies in it: two Mini Smarties, one Mozart Kugeln, two mini Milka Eggs with Oreo flavour, and three Lindt Lindor chocolate balls :-)


And because I couldn't close the lid entirely, it kept popping open, I made a closure on the side. For this I used one small Sizzix Framelits Circle die to cut out circles from the same glitter paper I used for the top snowflakes. 
I fix them to the side of the box with Tim Holtz Idea-ology Mini Fasteners. Then I applied silver string to close the lid.


And in the end let me show you the winter birthday cake with snowflakes I have made my 11 years old Eszter.


Have a wonderful Sunday!!!


Monday, 16 January 2017

Brenda Walton large medallion for winter birthday

My darling daughter, Eszter is 11 today!!! Happy birthday to her!!! 

So for this special day (while she is at school) I have made her a big rosette.


For making this I made 10 rectangles (the size of the bigz die I used) and stamped on it with Tim Holtz snowflake stamps and heat embossed with white embossing powder.

Then I cut out the shape of the medallion, glued them together, then hot glued in the middle.

I put some glitter to the edges.


What I used:


white embossing powder

silver glitter paper


With this winter party decoration I would like to join the Monday Challenge of the Simon Says Stamp blog: Chill Out


Thursday, 10 November 2016

Name banners for boys

This is a quick post to show you the name banners I have made for my lovely nephews. I promised them during the summer when we were in Hungary to make banners above their desks. 

On the banner you can see the abbreviations of their names (Zsigmond-Zsigi, Mátyás-Matyi). I know, it's greek to you - hahaha!


If you click on the pictures, you can see them in bigger sizes!

Oh, and Rachel, if you see this post, you can see that I'm totally hooked on your November challenge theme - hahaha again!

Monday, 18 January 2016

Sizzix - treat boxes for birthday party

The last weekend was Eszter's birthday. Like every year they celebrate her birthday at school with her classmates. So this week I have to bring a cake to the class and treat boxes for the kids. 


This time I chose Brenda Walton Treat Popper to make the little presents.


Well, this is why I had bought the Sizzix machine to be able to make 26 mini handmade presents! (If you counted my presents, you can see that here are just 24, because I had to make 2 different with other fillings for the classmates who have allergies.)


If you don't know how to assemble the treat popper, please click on Brenda Walton's video, she explains everything.


Almost everything :-)


As for the tissue paper, I figured out a size I cut out from my big roll. I needed a 13x35 cm piece to work easily with it.


Because the kids prefer a little bit more the quantity than quality, I tried the perfect arrangements for the sweets. For example the mini Milka chocolate bars didn't fit in well.


But two Lindt and two Frey chocolate bars, plus one mini box Smarties were just perfect.


I couldn't put more decorations on the boxes because I have  to place all into a bag on top of each other to take them to the school.


If you want to see my last year treat boxes, please hop over here.