Showing posts with label shadow box. Show all posts

Sunday, 21 February 2016

Easter shadow box with dies by Tim Holtz

I just finished my Easter shadow box. And because for this I used a toy box of my daughter I would like to enter of the Monday Challenge of the Simon Says Stamp blog: RECYCLE/UPCYCLE STYLE


Here is the box that I used. It was a quite sturdy box so I didn't want to put it into the waste paper bin :-)


Firs I gessoed the box, then I painted white with acrylic paint. When it was dry I started to stenciled. For this I coloured green my white texture paste. 


I tapped Rayher-DecoArt brown patina to the edges then I covered with a layer of Ranger Distress Crackle Paint (Clear Rock Candy).


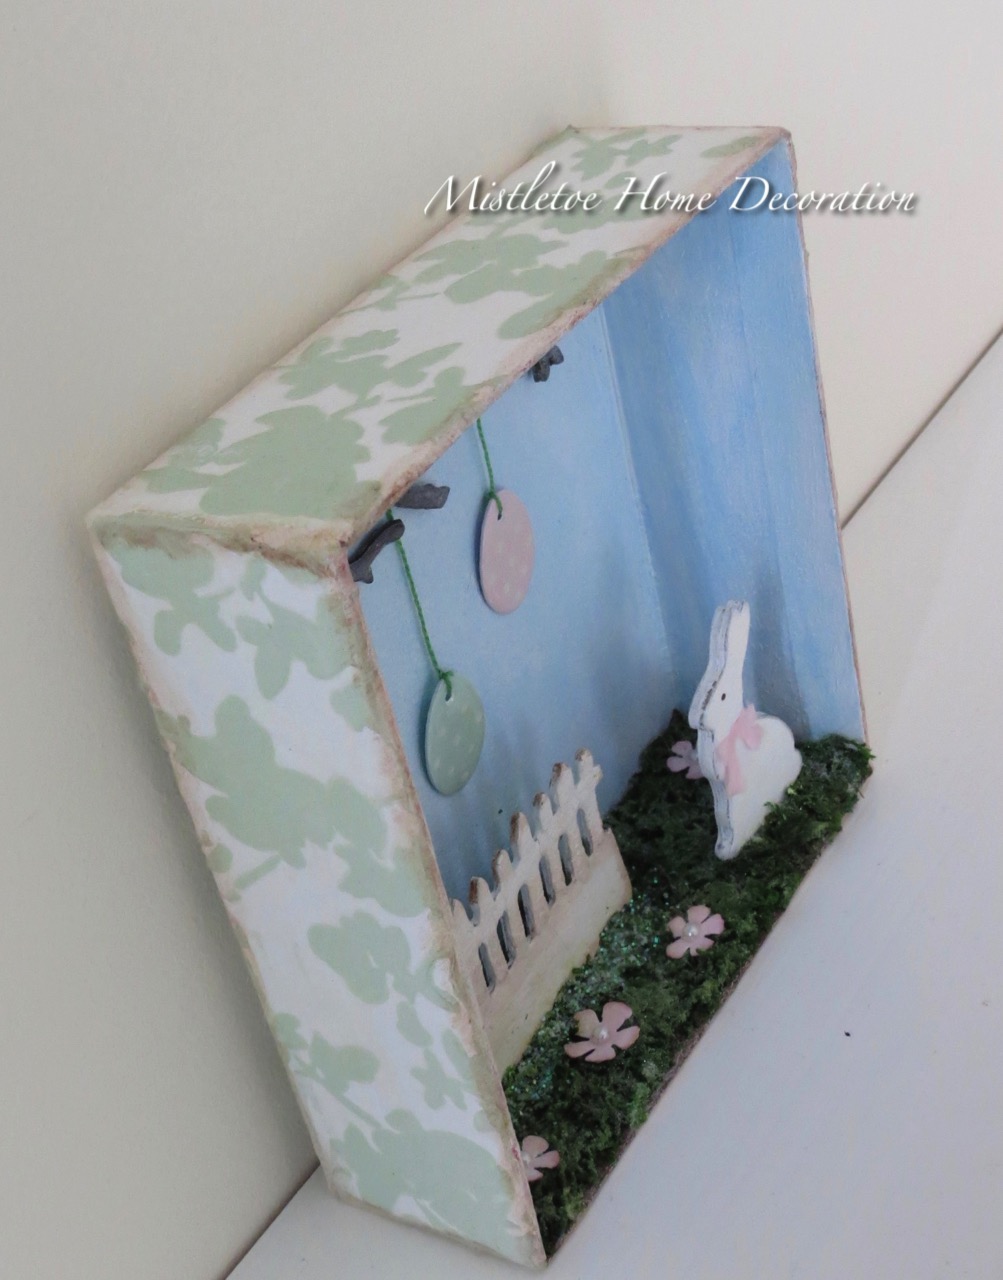
The inside was gessoed too and painted light blue.


I cut out the shapes from chipboard. Actually I used many layers to give dimension to my elements.


The eggs were painted with acrylic paints, after I put tiny white dots on the surface. In the end I covered with Ranger Glossy Accents.


I put four little flowers in the grass. I inked the edges of the petals with Victorian Velvet and I put tiny half pearls to the middle of the flowers.


What I used:


Sizzix Framelits Die, Eggs (658691)


I hope you like it! Happy crafting!


Tuesday, 1 December 2015

Victorian shadow box - Make a scene

Here is my project for the December challenge of the Country View Challenges blog - MAKE A SCENE. Please join this challenge with your own creation. I'm sure you can do something great in this  theme. Besides, you can win a £20 voucher!

As you can see, I have made a shadow box with a Victorian winter street. 


And now, let me show you how I transformed this:


into that:


First I made the street... I drew the shape of the inside parts to a white cardstock.  I painted blue the three side parts and on the bigger part I stencilled a wall.


I painted all side parts with acrylic paints. Since I wanted to make a realistic wall, I painted each line white among the bricks.


After I glued them into the box.


I cut out the window with Sizzix Bigz Die, Window Box by Tim Holtz. I painted it green.


I cut out the street lamp with Sizzix Bigz Die, Holiday Lamppost by Tim Holtz. I painted it silver after I coloured the edges with Ranger Distress ink (Walnut Stain).


I randomly painted snow everywhere.


I cut out the little girl from a little, paper shopping bag. I cut out two paper layers to make the girl sturdier.


With modelling paste and with fake snow flake I made the snowy pavement the same way like here. I attached the girl and the tree with hot glue.


The outside was covered with acrylic medium and with glitter powder. The edges was coloured with Ranger Distress inks (Antique Linen, Walnut Stain).


Thank you for visiting my blogpost and happy crafting!


What I used:


Sizzix Sizzlits Die, Brick Wall by Tim Holtz (658240)  - I used  the cut-out as a stencil

Ranger Distress ink pads (Walnut Stain, Antique Linen)


Marabu and Schmincke acrylic paints

white glitter powder

Schmincke acrylic medium