Showing posts with label Spring. Show all posts

Sunday, 21 February 2021

Card with yellow bird and ornate frame

Hello everyone, I'm here with my second project for our February challenge over at Country View Challenges, the theme was chosen by the lovely Miriam and it's First signs of Spring.

Like at my first project, I used a bird by Tim Holtz but here I put him in a frame instead of a wreath. 


The background paper was by stamping and embossing. For this, I used the Stampers Anonymous Lattice&Flourish background stamp set and the Ranger Vintage Pearl embossing powder. 


I cut off the excess with my Tonic, Tim Holtz Trimmer and then I inked the edges with Vintage Photo Distress ink. I also spattered with diluted Vintage Photo ink.

The little bird was coloured with Mustard Seed and Squeezed Lemonade Ranger Distress inks and here I inked the edges with Vintage Photo too.

The flower was premade. I made a few after I finished watching Tim Holtz demo. If you want to see how he made the flowers, you can click here. The flower shaping starts exactly after one hour.

Here are my papers and flowers.


What I used:

Sizzix Thinlits die, Feathered Friends by Tim Holtz

Sizzix Thinlits die, Garden Greens by Tim Holtz

Sizzix Thinlits die, Small Tattered Florals by Tim Holtz

Sizzix Bigz die, Ornate Frame by Tim Holtz

Stampers Anonymous, Lattice&Flourish by Tim Holtz

Stampers Anonymous, Tiny Text by Tim Holtz

Ranger embossing powders (Vintage Pearl, Fine White)

Ranger Distress inks 

half pearls

Idea-Ology, Long Fastener


If you have a Spring project, please don't hesitate to join our February challenge where a randomly selected winner can have a £20 voucher to spend in the Country View Crafts online shop.


With my card, I would like to join the Simon Says Stamp Monday Challenge: Add some texture


Monday, 30 March 2020

Easter coasters with Spring Shadows by Tim Holtz

Hello dear crafters, I hope you're all well and virus free. Although we are social distancing and on lockdown, Spring and Easter are still coming. So it was time for me to decorate our home where my family and I are spending most of our time right now.

First I would like to show you my coasters. 


For these coasters, I bought white blank cardboard coasters from Rayher. They call it Bierfilz :-)

Then I started to stamp randomly the images from the Spring Shadows stamp set with Ranger Distress Oxide inks. I chose the DOX inks for this because the Oxide inks have white or rather pastel tones.

After stamping, I heat embossed them with clear embossing powders. Here are the colours I used.


The edges of the coasters were inked with Pumice Stone and Antique Linen inks (not DOX) and I also spattered the coasters with diluted Antique Linen ink.

In the end, I put a layer of satin matt varnish for protection.


I really love these coasters, they go amazingly well with our interior where most of our furniture is white. So I'm sure I will make more coasters in the near future. 

With these coasters, I would like to join the:

Simon Says Stamp Monday Challenge: Spring Mood Board

Simon Says Stamp Wednesday Challenge: Anything Goes


Friday, 6 March 2020

Easter tag with a bunny and polka dot background

Hello crafty friends, I'm here again with a new Easter tag. How I arranged the die-cuts it's similar to my yesterday tag but I made another background for my Easter bunny.


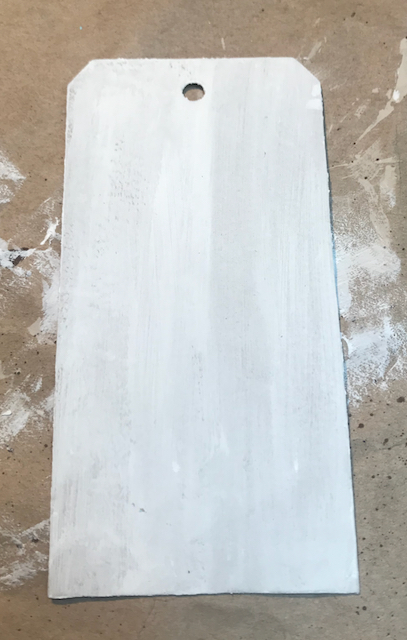
First I cut out a tag from chipboard and covered with gesso.


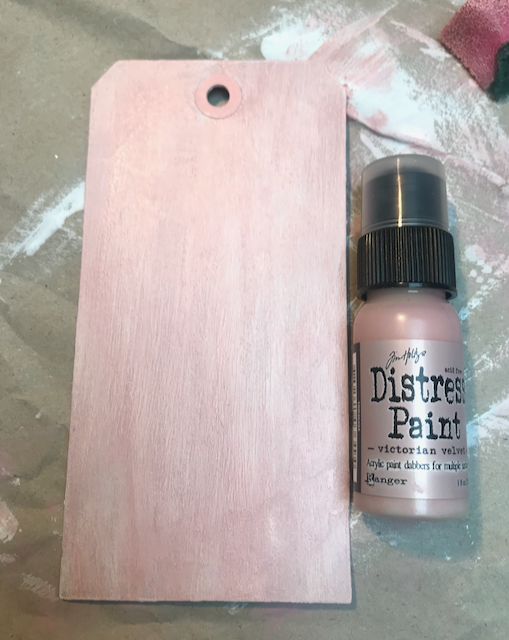
Then I painted with Victorian Velvet Distress paint.


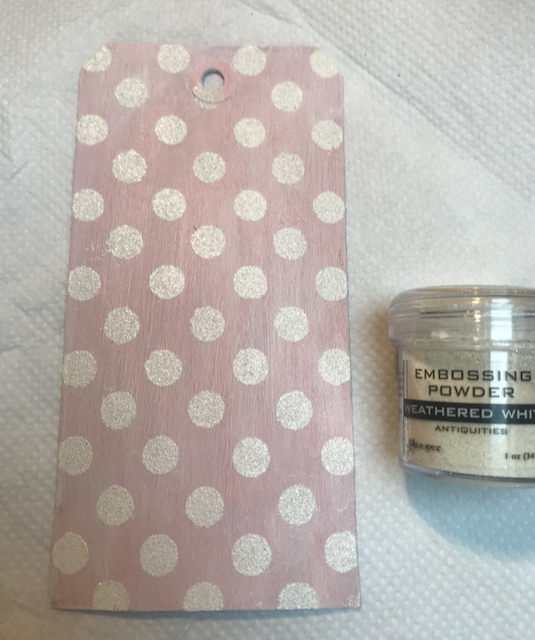
Then I added a little diluted Picket Fence paint to tone it down. When it was totally dry, I made a polka dot pattern using the Shifter Dots layering stencil and the Weathered White embossing powder.


I inked the edges with Vintage Photo Archival ink.


And then I spattered with Walnut Stain paint. As you can see, I made just tiny speckles. I used the same brush and paint to splatter the other elements.


What I used:

Sizzix Bigz die, Cottontail by Tim Holtz

Sizzix Bigz die, Tag&Bookplates by Tim Holtz

Sizzix Thinlits die, Funky Florals 1 by Tim Holtz

Sizzix Thinlits die, Funky Florals 2 by Tim Holtz

Sizzix Thinlits die, Small Tattered Florals by Tim Holtz

Sizzix Thinlits die, Wildflowers Stems 1 by Tim Holtz

Sizzix Sizzlits die, Vintage Lace strip by Tim Holtz

Stampers Anonymous, Shifter Dots layering stencil

Idea-Ology, Chit Chat Seasonal sticker book

Idea-Ology, Long Fastener

Ranger Distress paints (Walnut Stain, Picket Fence, Victorian Velvet)

Ranger embossing powder (Weathered White)

Ranger Distress Archival ink (Vintage Photo)


With my tag, I would like to join the:

Simon Says Stamp Monday Challenge: Tag it!

Simon Says Stamp Wednesday Challenge: Something feminine


I hope you like it!!! Thank you for stopping by!!!


Friday, 7 February 2020

Yellow flowers on wooden background - card

Hello everyone, here is the springy version of my earlier card.  I'm sorry, this time I have no time for writing a tutorial but you can find a lot of information here.


I didn't put any text on my card and on my earlier card neither because I need jolly joker cards for the upcoming birthdays, namedays and I might need thank you cards too.


With my card, I would like to join the:

Simon Says Stamp Monday Challenge: Floral Frenzy


I hope you like it!!! Thank you for stopping by!!!


Thursday, 30 March 2017

Easter card with Tim Holtz Snowglobe die - pink and yellow

Earlier this month I showed you an Easter card which was made with Tim Holtz Snowglobe die but I didn't give you tutorial about how I made it. 

Now at the Country View Crafts I give you a full tutorial with plenty of photos. 

So if you want to know how I put together these cards, please hop on the CVC blog!


I hope you like it! Happy crafting!


Sunday, 3 April 2016

Spring - altered Clementine box with stamped flowers

Hello again and greetings from London! Yes, I'm here in this fascinating city! With my husband we thought it was time to show Eszter, our 10-year-old daughter London.

So this is my second project for the April challenge of the Country View Challenges. The theme is SPRING. It was me who chose the theme this time and I hope you like it and you will show the CVC team your lovely projects!


So, this is an altered Clementine box. For Christmas I had already transformed a box like this into a festive holiday box. You can find it here.


Now let me show you how I made this.

I took an empty Clementine box.


And I painted white inside with DecoArt Chalky Finish Paint (Everlasting) and green outside with DecoArt Chalky Finish Paint (Refreshing).


After I started to stamp the flowers from Flower Garden Stamp Set of Tim Holtz  to the sides with Ranger Archival Ink (Jet Black).


Then with a small brush and Marabu (Bordeaux and Clementine) paints I coloured the stamped flowers. In the end I put a layer of satin finish varnish to protect my box.


Enjoy the spring and happy crafting!


Friday, 1 April 2016

Spring - Wooden round box with flowers by Tim Holtz

I like to make practical things and home decorating objects. This is why I have been making a lot of wooden box lately. So for our April Challenge - SPRING - at Country View Challenges I painted a wooden box with Tim Holtz flowers.


In an earlier blogpost I've already explained everything how you can make a stamped and painted box like this, so here I just give you details about the differences.


Well, this is a 14 cm diameter wooden round box.

The top and the inside of the box was painted by white DecoArt Chalky Finish Paint (Everlasting).

The bottom of the box was painted by soft pink DecoArt Chalky Finish Paint (Promise).


I stamped the images with Ranger Archival Ink (Jet Black).

I used the Stampers Anonymous, Flower Garden Stamp Set by Tim Holtz (CMS215).


After stamping the flower heads I used masking sheet to protect them because I didn't know then the directions of the stems.


I coloured the flowers with Marabu Paint (Bordeaux), except the anthers and the stems. For the anthers I used Marabu Paint (Mandarine) and for the stems DecoArt Paint (Forest Green).


In the end I put two layers of Schmincke Acrylic Medium onto the top and two layers of Satin Finish Varnish on the other parts of the box.


Happy crafting to you! And don't forget to join our April Challenge at Country View Challenges!


Saturday, 9 February 2013

Floral decoupage box for Spring


Here I am again with a floral box for Spring. It was quite simple to make. 


For this I used a floral IHR paper tissue and a plain white paper box. 


I cut out the floral motifs from the tissue.

I placed and after glued them to the top.


I glued one pattern to each side of the box itself.

When all dried I put a tiny amount of gold paint on a sponge and I smeared it around the flowers. 


Finally I covered the box with silky shine lacquer.