Showing posts with label decoration. Show all posts

Friday, 9 June 2023

Tim Holtz Harvey from felt - hanging decor

Let me show you my latest make a felt hanging decor that I created using Tim's Harvey Thinlits die set. What can I say? I'm rally happy with the result, but during the process I often felt that this project is a real challenge.


Here are some process photos where you can see that the back of Harvey is just as detailed as the front. 

The base was a thicker and sturdier white felt but all the layers were cut out from very thin felt. To cut out the forms from the thiner felts I run the die and the felt twice through the Sizzix machine, and three times to cut out the thicker base. If needed I helped with scissors.


The head and the hands are made with beige or nude colour.


Here is the back:


I only cut out those pieces which were not so detailed. And I didn't put too many layers onto each other. And the strip of the hat and the eyes were made from paper, because the too thin strip always ripped. I used Tacky Glue to glue the pieces on.

In the end I made a hole to the hat with a Crop-A-Dile Big Bite punch and I put in a piece of wool twine.

And one more thing, if I were do it again, I would use black felt as a base instead of white. Because of the white base, I had to colour Harvey's sides with Distress markers :-)


With this hanging decor, I would like to join the Simon Says Stamp Monday Challenge: Not a card


Tuesday, 25 October 2022

Halloween decoration - rosette with Tim Holtz's stamps

Hello everyone, I would like to show you a simple Halloween ornament that I made as a second inspirational project for our Harvest or Halloween challenge on the Country View Challenges blog.


For this, first I took a watercolour paper and cut out a circle with the Sizzix Thinlits die, Stitched Circles by Tim Holtz (662229). Then I stamped the owl in the middle from the Regions Beyond stamp set (CMS274). For this I used black Archival ink.


Then I masked the owl and stamped the text from the Reflections stamp set (CMS 111) with brown Archival ink on the circle.


I covered the whole surface with watered Antique Linen Distress ink, then inked the edge with Frayed Burlap ink.

I cut out a one size bigger circle with a stitched circle die, but I found it too big and I cut off the stitched part. Since I couldn't cut it evenly, I distressed the edge with a knife.

Then I stamped on an orange paper with the dots background stamp from the Dots&Floral stamp set (CMS220). I cut ot a scalloped circle with a Sizzix die (657552). I inked the edge with Ground Espresso ink.


Then I took a patterned paper from a First Edition paper pad and cut out four pieces with the retired Sizzix Bigz die, Snowflake Medallions by Brenda Walton (658739).

I assembled them using simple glue and hot glue in the end. if you don't know how to put together a rosette you can watch this video.


So if you have an autumnal or Halloween themed project, please don't hesitate to join our October challenge where a randomly selected winner can have a £20 voucher in the Country View Craft Shop.

Wit my project, I would like to join the SIMON SAYS STAMP Monday Challenge: Home Decor


Tuesday, 8 March 2022

Hanging bird ornament with Feathered Friends die set

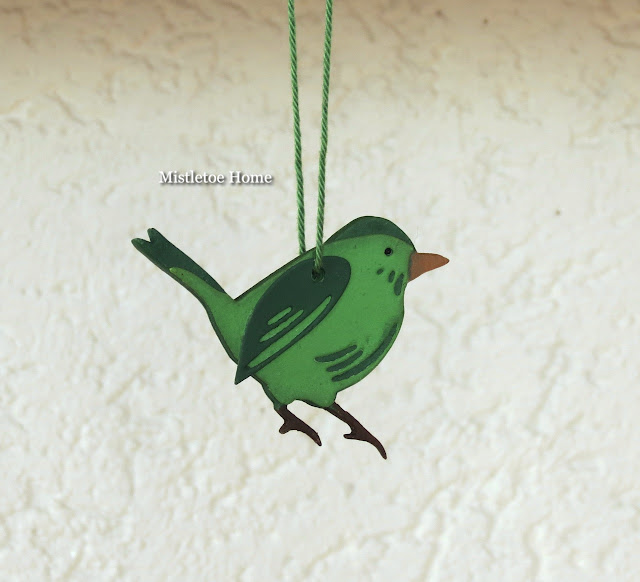
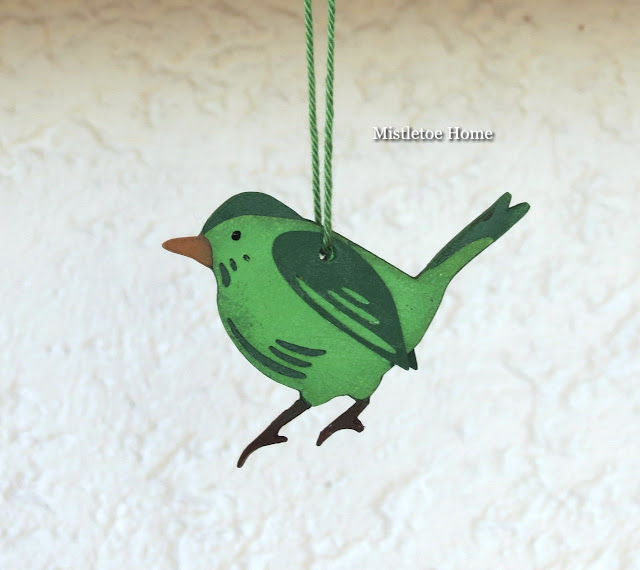
You may have seen the tag with the green bird and striped background a few days ago here on my blog. If not, and you are interested, please click here. My friend who got that tag as a gift, also got a little green bird ornament. This one.


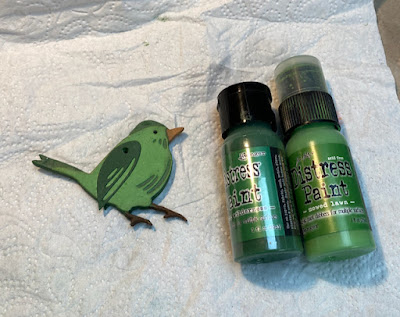
For making this, I cut out the bird many times from thick paper to give him a dimension. When I started to glue them together, I punched a hole in the same place each time because I couldn't punch through the final bird because of its thickness. I coloured the bird with Mowed Lawn and Rustic Wilderness paint. The peak was a mixture of an orange and maybe Pumice Stone paint.


The eyes were made with black Nuvo Crystal Drops.


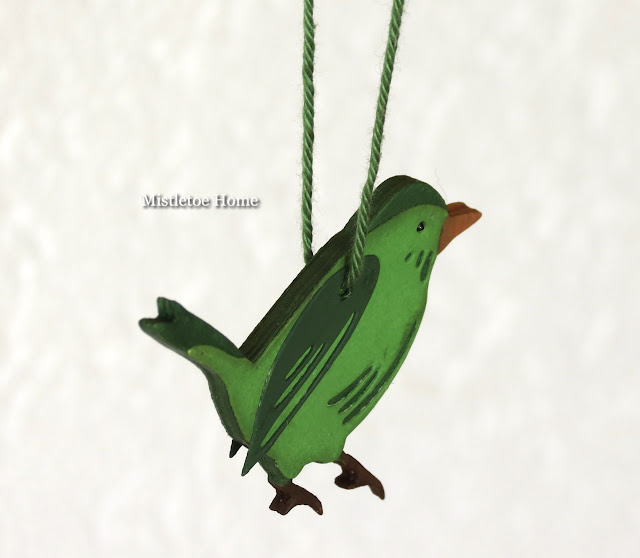
Here you can see the thickness of the bird.


With this ornament, I would like to join the Simon Says Stamp Monday Challenge: Add some green


Wednesday, 17 November 2021

Colourful glitter house decoration - Paper Village by Tim Holtz

Well, this is not my first project with Tim's Paper Village. Last year I made many different designs. Like the one with pastel colours, or the other one with Distress colours, but I also made houses with kraft colours

But this time I wanted to try the so-called Putz houses, the completely glitter covered paper houses. So I made these:


And now I will try to write an easy-to-follow tutorial for you and for me because I always use my earlier tutorials. I do sometimes forget how I did something, what technique I used before.

First, I cut out the houses from 300 gsm watercolour paper with Sizzix Thinlits Paper Village die. I cut out 8 pieces from the bigger house (for making 4 house) and 8 from the smaller one. Then I took my new Thinlits Village Collection die set and chose the smallest window to cut out the windows.


After I assembled the houses I coloured them with DecoArt paints. I put two layers on them.


Then I cut out the window frames. For this I chose the smallest window frames from the Village Collection set. The little heart I always put on my houses is in the Valentine Side-Order set.


The door is part of the Paper Village set but as it is a hinged door I had to cut off the door from the "hinge".


Then I glued the doors on the houses.


Then I covered the houses with Schmincke Fluid Medium and sprinkled with Clear Rock Candy glitters.

When the houses were dry, I put vellum behind the windows. I cut out little pieces and glued them with the same Schminke Fluid Medium. I applied the fluid medium with a brush behind the windows.


I cut out the roofs and then poked a hole in the middle of them.


Then I threaded a silver string through the hole and tied a knot at the end.


Here you can see that I glued the roofs on the houses.


Now it was time to glitter the roofs. For this, I used the same medium and the same glitter. I glued a small base under the houses and I also covered with glitter the edges of the base.


Thank you for stopping by!!! Happy crafting!!!


Monday, 1 November 2021

Pocket watch Christmas ornament with Santa by Tim Holtz

Hello everyone, it's already November so it's time to start a new challenge over at the Country View Challenges. The new challenge theme is Christmas gifting and the lovely Miriam will be your hostess this month. For this challenge, I created a Christmas ornament, of which there is an earlier version. A few years ago, I have made a similar Christmas ornament with Tim's Pocket Watch Movers&Shapers die. You can see it here.

And voilà the new one.


And since I didn't added a tutorial for the earlier decoration, I'm making up for this shortcoming. 


I cut out a pocket watch shape from silver glitter paper. This will be the back side of my watch.


Then I cut out a circle shape from Neenah Solar White paper with one of the Sizzix Framelits dies. From the 657551 set, one almost perfectly fits in the pocket watch. Then I stamped the Santa image with Tsukineko Memento Espresso Truffle ink. I coloured the image and the background with Copic Sketch Markers. 


Then I cut out another pocket watch shape from grey cardstock, but this time I fussy cut the inner circle of the watch with scissors. It was easy because of the score line.


I glued this to the first cut-out.


Then I coloured the edges with brown alcohol ink.


The next step was to glue the image with Santa into the watch.


Then I traced around the line of the used die on an acetate and cut it out with scissors. 


I glued the acetate on the watch covering the coloured image.


Then I added many layers of of the frames only. The next layers were cut out from chipboards.


The last layer was a glitter paper cut-out.


Now it was time to decorate the watch with greens and a star.


The edge of every cut-out was inked with Vintage Photo Archival ink.


The little baubles were attached with hot glue gun. 


And not forgetting the back side where I added a glittery Merry Christmas text.


What I used:

Stampers Anonymous, Vintage Holidays (CMS423)


Sizzix Movers&Shapers die, Pocket Watch Frame (658571)


Sizzix Bigz die, Crescent Moon&Stars (658716)


Sizzix Framelits die, Circle


Sizzix Thinlits die, Holiday Greens (658759)


Sizzix Thinlits die, Pine Branch (664228)


Sizzix Thinlits die, Home For The Holidays (662419)


Idea-Ology Baubles


If you have a Christmas project which is not a card and would be a good gift please don't hesitate jo join our November challenge where a randomly selected winner can have a £20 voucher in the Country View Crafts online shop.


Since it's a gift I think it can fit the SSS Monday Challenge: Thinking of You.