You are in the right place if you wanted to visit Santa's Workshop. Let's start in the Snow Globe Department!

For this card, I used the Sizzix Tiny Snowglobes by Tim Holtz and of course, other dies. And if you like my card and if you have time, here is the part for a long tutorial.
My idea was to use as many images from Tim's Snowglobes die set as I can. Here you can see an earlier card where I also made a snowglobe with Santa.
So creating a snow globe department seemed a good idea for putting a lot of snow globes on my card.
First I cut out 6 snowglobes (bases plus circles). For the bases, I used kraft cardstock and for the circles, I used watercolour paper.
And I also cut out the shelves using the Sizzix Laboratory Thinlits die set by Tim Holtz. These were cut out from kraft cardstock as well.

Then I started to cut out the little elements and assemble them. For this, I usually used coloured cardstock, except the Santa, he was hand-painted.
I painted Santa's face with DecoArt Light Buttermilk and the suit with DacoArt Santa Red paint. Then I glued the beard and the fur trimming which were cut out from white watercolour paper.

Then I painted black the boots and glued the other trimmings and the pompom. His nose was coloured with Tattered Rose Distress marker.

With a black marker, I put two little dots for making eyes for Santa.
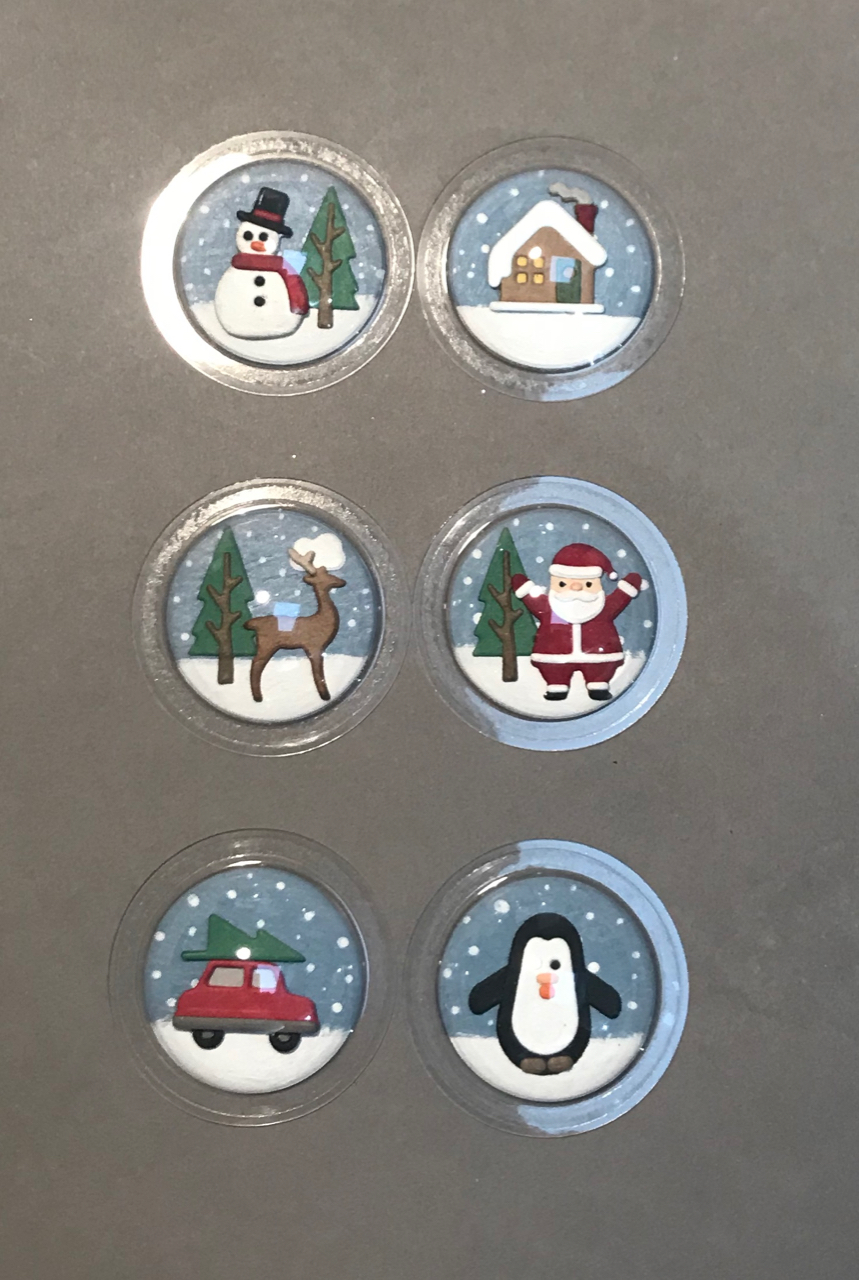
Here you can see how I filled the tiny snowglobes with the cutouts.

Then I started to paint the backgrounds. For the sky part, I used Stormy Sky Distress paint. For the snowy part, I used Picket Fence Distress paint. Then I added tiny dots with a fine brush for creating snow.

Then I adhered the tiny elements onto the painted circles.

Now here comes the tricky part when I had to be very precise. First of all, I found the perfect background paper (Idea-Ology Dapper 12x12), then I measured where to put the shelves and the snowglobes. After this, I started to cut out the circles.

When I was ready with all the circles, I drew the outlines of the circles on a 300 gsm grey cardstock.

Then I adhered my little snowglobes onto the grey cardstock, placing them into the drawn lines. After this, I placed the Sizzix Dimensional Domes over the circles.
At this part, I have to tell you that I wanted to put glitter into my snowglobes. I poured glitter powder in the middle of the circle but the glitters just stuck onto the surface of the dome and everything was blurry and I hardly saw my lovely scene. So I got rid of the glitter and adhered the domes without any glitter.
The next step was to glue the background paper on the grey cardstock and to cut out the text with Sizzix Alphanumeric Label Thinlits dies.
I inked the edges of the striped paper with Gathered Twigs Distress inks, then I smeared Picket Fence and then I inked with Antique Linen Distress ink.

I took the Village Christmastime Thinlits die set and decorated the shelves with them. I put Mini Fasteners into the holes of the shelves.
To the bottom, I adhered the Special Delivery paper from the Christmas Ephemera pack. And I also added four stars from the Mirrored Stars Idea-Ology pack.
Then I placed my card to a white card base. And that's it! But actually, I have to admit, it was a big job :-)

Here are some close-ups:


I hope you like it!!! Happy crafting!!!
With my card, I would like to join the challenge of the Funkie Junkie Boutique: It looks real - since my snowglobes look like real tiny snowglobes with real glass.
Awesome project!
ReplyDeleteThanks for sharing all the details.
Wow - such patience with all those tiny die-cuts, but it's so worth it. Your snowglobes look fantastic, and the whole card design is really delightful.
ReplyDeleteAlison x
Wow, what patience! Darling project.
ReplyDeleteSweet set of mini snowglobes with so much beautiful detail! Thanks for joining us in The Funkie Junkie Boutique "It Looks Real" Challenge!
ReplyDeleteThis is such a sweet project and I love how you decorated the inside of each snow globe. You have incredible patience to put all those tiny figures together. Thanks for joining us at The Funkie Junkie Boutique Challenge Blog.
ReplyDeleteHigs!
Cec
Wow! What a lot of time and love went into this! I love those tiny realistic looking snow globes! I agree with Cec; you have a lot of patience, and obviously better eyesight than I have! I'm delighted you played along in our Is It Real challenge at The Funkie Junkie Boutique blog, Monika! Hugs!
ReplyDeleteSo adorable!!! I'm amazed at how many details you were able to add to those sweet little snow globes. Thanks for joining us for our challenge at the Funkie Junkie Boutique Blog. Crafty hugs from Ginny at Polly's Paper Studio : )
ReplyDeleteThank you very much for the instructions on Santa!
ReplyDelete