Showing posts with label Santa Claus. Show all posts

Saturday, 21 October 2023

Believe in the magic - Santa Greetings by Tim Holtz

Hello everyone, finally I had a little time to make a Christmas card. For this I used the Santa Greetings die set by Tim Holtz again. But this time I created a night scene for him. Here is my previous card where you will also find a tutorial of how to assemble Santa. 


I really enjoyed to make the background where I just layered many different shades of the blue. I think I started with Prize Ribbon, then I added some Broken China and Salvage Patina to the moon's corner. I added some Chipped Sapphire to the edges. Then I splattered with white paint. As a final step I blended Black Soot Archival ink to the edges.

For the snow part, I used a vintage white.

As I mentioned at the beginning you will find Santa's tutorial in my earlier blog post.

For the moon I used Antique Linen ink (original and oxide) and Pumice Stone oxide ink. Then I added white paint, to mute the colours. 


The text was stamped with embossing ink and heat embossed with black embossing powder.

For the stars I used silver glitter paper.


What I used:

Stampers Anonymous, Bold Tidings Mini (CMS440)

Sizzix Thinlits die, Santa Greetings Colorize (666338)

Sizzix Thinlits die, Moonlight (666386)

Sizzix Thinlits die, Swirling Stars (663095)

Ranger embossing powder (black super fine)

Ranger Distress paints (Barn Door, Broken China, Candied Apple, Chipped Sapphire, Lumberjack Plaid, Prize Ribbon, Salvaged Patina)

Ranger Distress Oxide ink (Antique Linen, Pumice Stone)

Ranger Distress ink (Antique Linen)

Ranger Distress Archival ink (Black Soot)

Ranger Distress embossing ink

etc.


I hope you like my card! Thank you for stopping by!


With my card, I would like to join the Simon Says Stamp Monday Challenge: Text it


Sunday, 1 October 2023

Christmas card with Santa Greetings by Tim Holtz

Hello everyone, let me show you my latest make with one of the cutest Santas by Sizzix, Tim Holtz. This weekend I had a little time to create, so I decided to assemble this pieces of the Santa Greetings Colorize die.


Here I will start a long tutorial, because Because my assembly order is different from the one on the Sizzix YouTube channel. Usually I like and follow the Colorize tutorials step by step, but when I followed it here, somehow the parts didn't fit well. 

The main piece of Santa was coloured with Lumberjack Plaid Distress paint.


When it was dry, I glued the biggest white part on it. The white part was cut out from creamy white paper and I inked the edges with Antique Linen Distress ink.


Then I added the face part and the ears. I coloured them with Copic markers and I inked the edges with brown ink.


Then came the red layers. These pieces were coloured with red Distress paints. Sometimes I mixed colours, so I can't give you exact colour names.


Then the second layer of the face.


Then came the grey belt and immediately the black parts, the top layer of the belt and the eyes. These pieces were cut out coloured paper. And you can see, that I also added the missing white part, the pompon to the hat.


Then I glued the white top layer. I cut them out from white paper, I mean real white.


Then I added the white fur trims on Santa's coat and the boots.


Then I adhered the white part of the belt and the mittens. The parts of the mittens were cut out from black and dark grey papers.


And then the gold belt buckle.


The background:

I cut out a 5x5 inches square panel. I painted the top part with Speckled Egg and the bottom part with a Marabu Mineral White paint.


Then I stamped pine trees with Hickory Smoke Arcival ink to the background. 


I splattered the whole background with watered white paint. 


What I used:

Sizzix Thinlits die, Santa Greetings Colorize (666338)

Sizzix Thinlits die, Swirling Stars (663095)

Stampers Anonymous, Tree Line (CMS244)

Idea-Ology, Christmas Kraft-Stock paper (TH93626)

Idea-Ology, Big Chat Stickers (TH93192)

Ranger Distress paints (Speckled Egg, Lumberjack Plaid, Barn Door, Candied Apple)

Ranger Distress Archival ink (Hickory Smoke)

Ranger Distress ink (Antique Linen)


With my card, I would like to join the Simon Says Stamp Monday Challenge: Christmas

I hope you like! Have a fantastic October!


Thursday, 15 December 2022

Vintage Hungarian Christmas cards #127

 I'm here again with a vintage Christmas postcard from 1940.


I don't know who the Dr signature could be, who the illustrator was, but I assume that this card is not a German or Italian import, but one of the few postcards made in Hungary.

It's beautiful, isn't it?

You can find my other vintage Christmas cards, just click on the label - old Christmas cards - on the sidebar.


Thursday, 24 November 2022

Twig and Stump meets Santa Claus

Now, after many posts with Harvey, here I am with Twig and Stump the two adorable snowmen from the latest Sizzix release by Tim Holtz. 


I imagined a scene, a night before Christmas, when Twig and Stump notice Santa and his reindeers in the sky. And they start waving to them, and Santa wishes them a Merry Christmas. To create this scene, I used the last year Diecember die by Sizzix Tim Holtz, the Dash Away All. This had the perfect size for my card.

For the background I used blue inks and spray stains. I just added layers after layers. First I started with lighter colours and I added darker like Chipped Sapphire close to the edges. I also added Black Soot to the edges. In the end I sealed the whole sky part with diluted Uncharted Mariner paint.


The tree was inked with Crushed Olive and Rustic Wilderness. I inked with Speckled Egg the edges of the snowmen. I put white paint to the edges of the pine tree. I started to glue on the die-cuts on the card, then I splattered with white paint.


And one more thing. I stamped one of the sentiments from the Doodle Greetings 2 stamp set on the inside of the card. 


What I used:

Sizzix Thinlits die, Twig&Stump (666072)

Sizzix Thinlits die, Dash Away All - Diecember 2021 (665468)

Stampers Anonymous, Tiny Text Christmas (CMS424)

Stampers Anonymous, Doodle Greetings 2 (CMS286)

Ranger Distress inks, paints


I hope you like it! Happy crafting!


Friday, 4 November 2022

Box card with MFT Secret Santa

Two years ago I made a Christmas box card for the MFT Stamps Card Design Superstar contest but that time I joined the Innovation Master category although I didn't do any innovation I just used the MFT box die and other stamps and dies. But I really liked that design and when I saw that this year the third category is Box Card Master, I thought I gave that card a chance again with some modifications of course. Here you can see my earlier design. 


And here is my new design.


The first and most important change that here I combined the Outside The Box die set with the Outside The Box Level-Up Die-Namics. I did this because the side elements of the second die set gave me the possibility to fix my cut-outs in different heights. So the elements are more visible, they don't cover each other. 

For the curtains, I also combined two die sets, the Classic Window and the Take The Stage. 

Here you can see two process photos.


What I used:

MFT Stamps, BB Secret Santa stamp set

MFT Stamps, BB Secret Santa Die-Namics

MFT Stamps, Take A Seat Die-Namics

MFT Stamps, Classic Window Die-Namics

MFT Stamps, Take The Stage Die-Namics

MFT Stamps, Outside The Box Die-Namics

MFT Stamps, Outside The Box Level-Up Die-Namics

MFT Stamps, Santa Sends His Love stamp set

MFT Stamps, BB Santa's Elves stamp set

MFT Stamps, Summertime Polka Dots paper pad

MFT Stamps, Solid Strips paper pad

Copic Sketch markers

double sided foam tape adhesive


I hope you like it! Happy crafting!


Sunday, 30 October 2022

Christmas card with MFT Jingle All The Way stamp - Santa on the roof

Hello everyone, I would like to show you my Christmas card that  I made for the MFT Card Design Superstar Contest in the Coloring Virtuoso Category. 


I wanted to create a night before Christmas scene with Santa on the roof. He is just checking his list before delivering the presents to the children in that household. 


For manking this scene, I mixed the Jingle All The Way stamp set with the Shout It From The Rooftops.  First I stamped Santa and the reindeer, then I used masking sheet to cover them, then I stamped the roof. I created the moon and the clouds by myself with Copic Sketch markers. Here you can see the process photos.


What I used:

MFT Stamps, BB Jingle All The Way stamp set

MFT Stamps, YUZU Shout It From The Rooftops stamp set

Copic Sketch markers

masking sheets

etc.


Tuesday, 7 December 2021

Black and white card - Village Christmastime by Tim Holtz

I really don't want to jinx it but the special DieCember Santa die set, the fruit of Tim Holtz and Simon Says Stamp collaboration is on its way to me. And hopefully it will arrive. This new die set is called Dash Away All. 

In the meantime, I made a card using the older and bigger version of the Dash Away All set, the Village Christmastime.


This is a black and white slimline card and is made as follows.

I cut out the Santa two times and glued the two cut-outs together. 

I cut out a slimline card panel from watercolour paper (300 gsm) and blended Black Soot Distress Oxide ink on the surface.


Then I started to stamp trees on the bottom part with Distress Black Soot Archival ink. For this I used a stamp from an old and discontinued die and stamp set by Sizzix Tim Holtz but I think you can find the same pine tree set in the Reindeer Flight stamp set (CMS052).


Since I found glue residue on the Santa cutout, I painted it with black acrylic paint. I glued the Santa on the card and I spattered the whole card with diluted white acrylic paint.

I inked the edges with Black Soot Archival ink.

What I used:

Sizzix Framelits die and stamp set, Holiday Joy (659376)

Sizzix Thinlits die, Village Christmastime (662424)

Ranger Distress Oxide ink (Black Soot)

Ranger Distress Archival ink (Black Soot)

black and white acrylic paints

etc.


With my card I would like to join the Simon Says Stamp Monday Challenge: Santa


Monday, 6 December 2021

Vintage Hungarian Christmas cards #101

Unfortunately I couldn't find any clue for this postcard to figure out which year it is from. It wasn't posted despite having filled the address section. 


However it is undoubtedly a beautiful postcard and a Santa card with green cape at that, so I couldn't leave it at the dealer :-)

You can find my other vintage Christmas cards, just click on the label - old Christmas cards - on the sidebar.


Sunday, 5 December 2021

Vintage Hungarian Christmas cards #100

This is the 100th postcard I present to you from my collection and once again I have a Santa card.


This Santa Claus doesn't look like a kindly old gentleman, he looks more like a grumpy gnome. But who doesn't find gnomes cute? I think they are cute too.

This card was posted in 1935.

You can find my other vintage Christmas cards, just click on the label - old Christmas cards - on the sidebar.


Friday, 3 December 2021

Vintage Hungarian Christmas cards #98

What a beautiful vintage postcard and how adorable is the crying little boy in the foreground! 


This card was printed in Austria and posted in 1907! I'm so lucky to have this embossed vintage postcard with Santa!

You can find my other vintage Christmas cards, just click on the label - old Christmas cards - on the sidebar.


Thursday, 2 December 2021

Vintage Hungarian Christmas cards #97

It's time to continue the presentation of my vintage Christmas card collection. Every December, every single day (almost) until the 24th of December I show you here, on my blog a vintage Hungarian Christmas postcard.

Here is the first. 


This card was posted in 1930. This card is special because Santa has a blue cape. As I am a card maker myself, I would write about this as a comment to this card: Beautiful CAS card!!!

You can find my other vintage Christmas cards, just click on the label - old Christmas cards - on the sidebar.

Monday, 22 November 2021

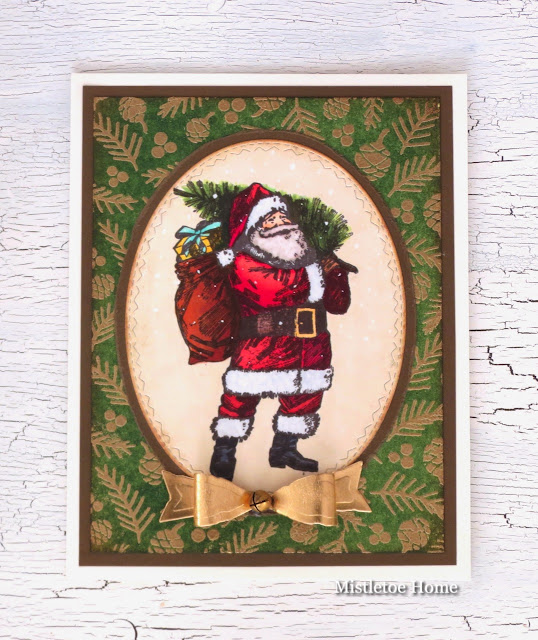
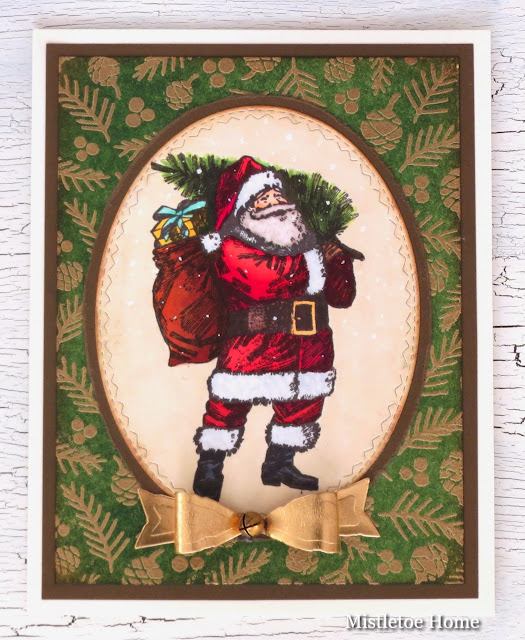
Christmas card with Santa from Vintage Holidays stamp set

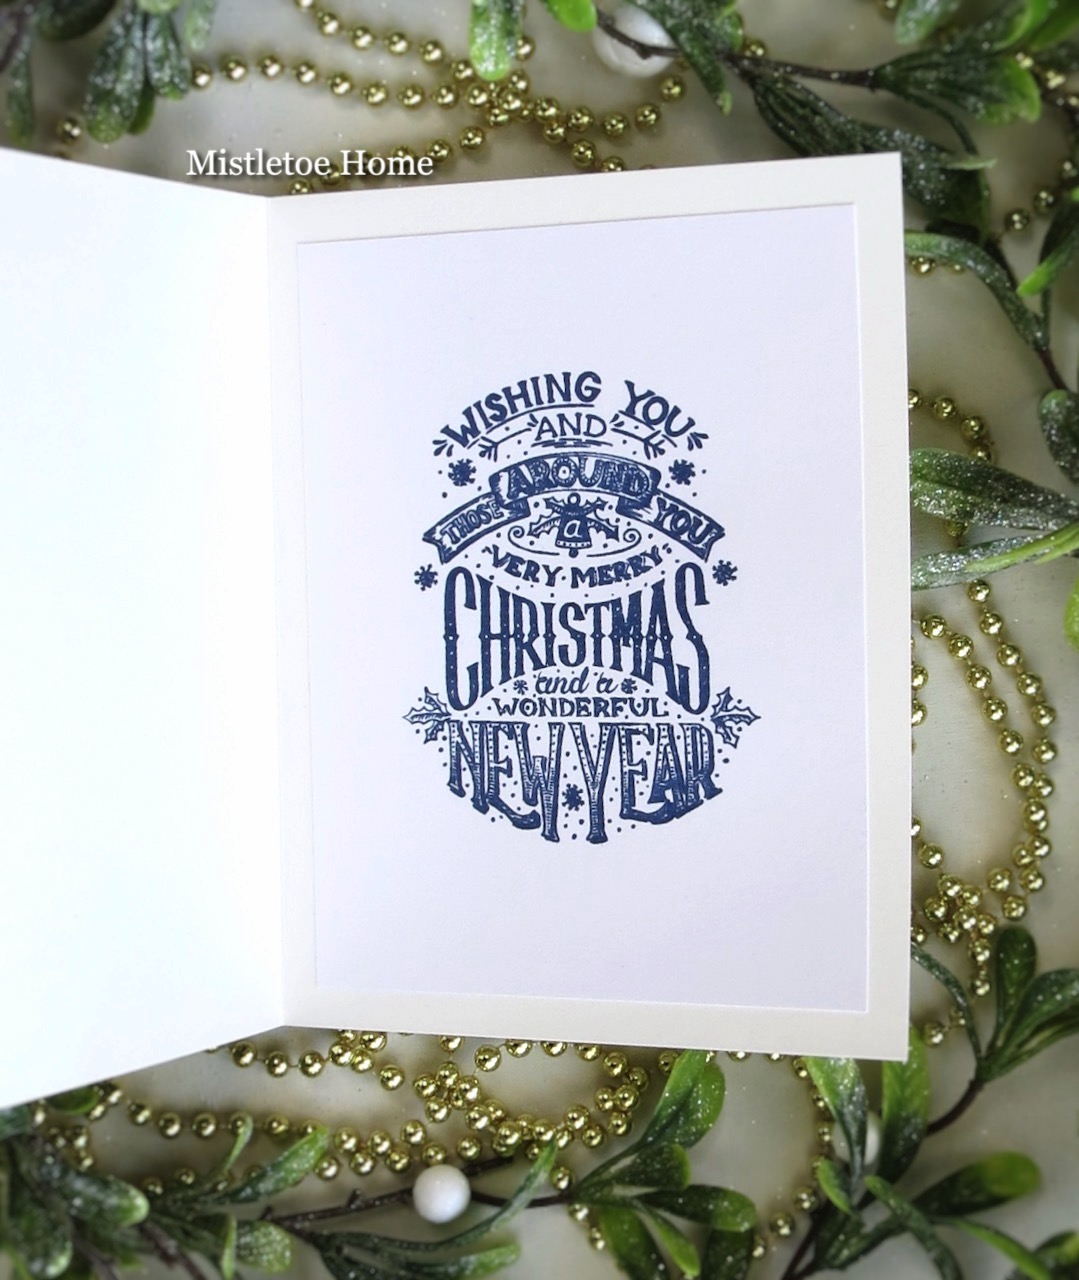
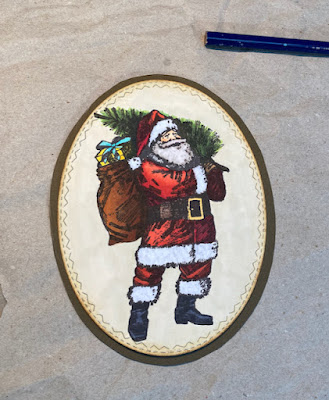
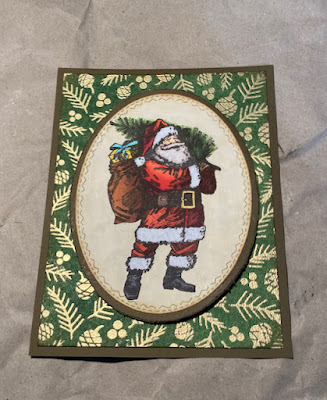
After Tim's demo on Saturday, I felt like stamping and stencilling. To do this, I took out my new favourite Santa Clause stamp and a stencil that I've never used before. Here is what I made.


And here is my tutorial. 

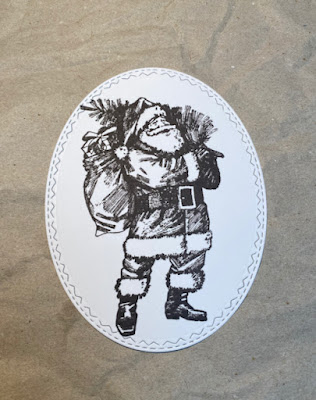
I cut out an oval panel with the biggest die of Tim's Stitched Oval set from Neenah Solar White paper. I stamped the image with Tsukineko Memento Espresso Truffle ink.


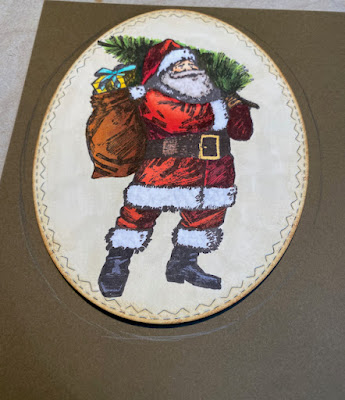
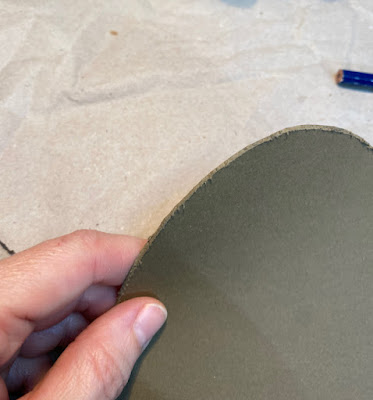
I coloured the image with Copic Sketch markers. I coloured the background with Copic markers too. I inked the edges with brown Distress inks (maybe Vintage Photo and Walnut Stain). Then I placed the oval panel on a brown paper and I drew a few millimetre larger oval than the original on the brown paper. 


I cut this out. 

Don't worry if it's not perfect. Since I distressed the edges with a knife, it took away the unevenness. 


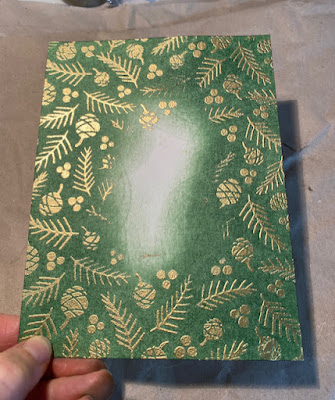
For the background, I took my favourite watercolour paper and cut out a rectangle panel. Then I started to blend ink through the stencil and heat embossed with gold embossing powder. as you can see in the picture, I didn't bother with the middle because I knew it would be covered anyway. After the embossing I blended Rustic Wilderness onto the surface.


I inked the edges with Walnut Stain ink. I glued this panel onto the same brown paper that I used for the oval.


I wanted to put something else on my card, so I tried different texts but I discarded all because none of them showed well. I ended up putting a bow with a jingle brad.

What I used:

Stampers Anonymous, Vintage Holidays stamp set (CMS423) 

Stampers Anonymous, Gatherings stencil (THS152)

Sizzix Thinlits die, Fold-Up Bows (662415)

Sizzix Thinlits die, Stitched Ovals (661188)

Idea-Ology Jingle Brads (TH93743)

Idea-Ology Metallic Kraft paper

Ranger embossing powder (Princess Gold)

Ranger Distress Ink (Rustic Wilderness, Vintage Photo, Walnut Stain)

Tsukineko Memento (Espresso Truffle)

Copic Sketch markers

etc.


I hope you like it!!! Thank you for stopping by!!!