Showing posts with label masculine. Show all posts

Wednesday, 20 September 2023

Masculine birthday tag with the Professor

Hello everyone, I'm here with a tag that I made for my nephew who will turn 15 at the beginning of November. I know, it's just September, but I always have to do the celebration cards in advance because I have to send them to Hungary.


And here is the tutorial:

I cut out a tag from chipboard and put a layer of gesso on both sides. When it was dry, I painted blue with Faded Jeans Distress paint.


Then I added a tiny bit of Chipped Sapphire here and there, spritzed with water, then soaked up the water with a paper towel. Then I splattered with Speckled Egg paint.


Then I stamped the Professor on Neenah Solar White paper with Tsukineko Memento Espresso Truffle ink and coloured with Copic Sketch markers. Then I stamped the circle where I planned the head of the professor using an embossing ink. Then I heat embossed using black super fine embossing powder by Ranger.

The hat was stamped with Tsukineko Memento Tuxedo Black ink and coloured with Copic Sketch markers.


For the birthday text I used embossing ink and black embossing powder. On the back of the tag, I also stamped a motivation quote and I was so happy when I noticed that it has the same font type as the happy birthday text.


The prize ribbon is part of an old and retired die set but it was perfect to put the numbers on it.

I inked the edges of the tag with Black Soot Ranger Archival ink and spattered with Black Soot paint the front page.


What I used:

Stampers Anonymous, The Professor 1 (CMS373)

Stampers Anonymous, The Inspector (CMS465)

Stampers Anonymous, Crazy Things (CMS237)

Stampers Anonymous, Crazy Talk (CMS236)

Stampers Anonymous, Ponderings (CMS252)

Sizzix Movers&Shapers die, Mini Trophy&Prize Ribbon (659444)

Sizzix Bigz die, Crescent Moon&Stars (658716)

Sizzix Thinlits die, Alphanumeric Label (664177)

Ranger Distress paints (Black Soot, Chipped Sapphire, Faded Jeans, Speckled Egg)

Ranger embossing powder (super fine black)

Ranger Archival ink (Black Soot)

Copic Sketch markers

Neenah Solar white paper

glitter paper

etc.


With my card I would like to join the Simon Says Stamp Monday Challenge: What's your favorite color? 

Actually, I have two favourite colours, the green and the blue, but the blue which appears more often on my projects and in my wardrobe too :-)

Friday, 16 June 2023

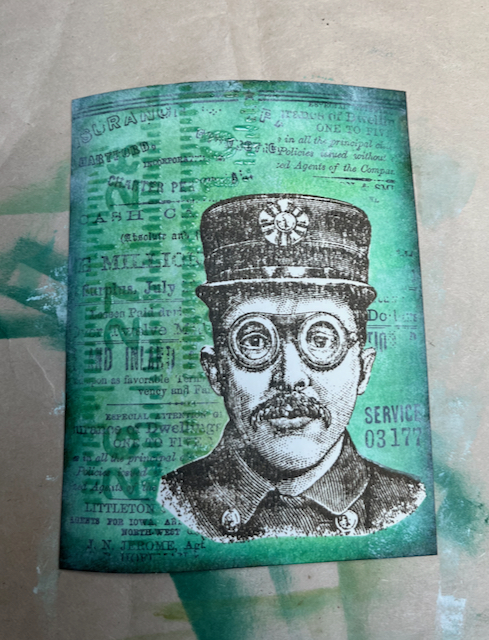
Masculine card with Inspector by Tim Holtz

Hello everyone! Lately I received a package with everything I ordered, including Tim's Rotary Media Trimmer, inks, embossing folders, Idea-Ology stuff and The Inspector stamp set.

So here is my first attempt with The Inspector.


And here is the tutorial.

I stamped the inspector with Vintage Photo and Black Soot Archival ink on a watercolour panel.


Then I covered the image with a mask paper.


I coloured the panel with Salvaged Patina, Peeled Paint and Pine Needle. Then I stamped around the inspector with Black Soot Archival ink using the Professor 2, The Inspector stamp sets.


Then I inked the edges with Ground Espresso.


Then I toned back the bold colours with diluted white paint.


Then I stencilled the panel using the Measured stencil and Ranger Transparent Matte texture paste. Then I sprinkled the embossed part with a mixture of Salvaged Patina and Speckled Egg embossing glaze. When the embossing paste was dry, I melted the embossing glaze on the top of the embossed surface with a heat tool.


Then I removed the masking sheet.


Then I coloured the image with Distress markers.


Then I wanted to add something else, so I put some gears to the edges. I coloured the gears with brown paint.

What I used:

Stampers Anonymous, The Professor 2 stamp set (CMS395)

Stampers Anonymous, The Inspector  stamp set (CMS465)

Stampers Anonymous, Measured layering stencil (THS012)

Sizzix Thinlits die, Gearhead (661184)


With this card, I would like to join the Simon Says Stamp Monday Challenge: Masculine


Saturday, 11 March 2023

Masculine birthday card

Hello everyone, I'm here with my second inspirational project that I made for the March challenge of the Country View Challenges. The theme is: Birthday card for a man

For this card, I had an inspiration from my first project, two birthday cards that I made for twins.  You can see them here. This one will be for my husband, but just in July!


I won't write you a tutorial here because you can find a detailed one if you click on the link of my earlier project.  

Here I'm just talking about the only difference, the colour of the balloons and the bow-tie.

So for creating this yellow I used the following Distress colours: Squeezed Lemonade, Mustard Seed and Fossilized Amber.


So if you made a masculine card, please don't hesitate to join our March challenge where a randomly selected winner can have a £20 voucher in the Country View Craft Shop! Good luck!

Wednesday, 1 March 2023

Masculine birthday cards for twins - Gentlemen by Tim Holtz

Hello everyone, I'm here with my first inspirational project for the March challenge of the Country View Challenges. The theme is Birthday card for a man and the lovely Corrie is the hostess of this theme.

Well, for the first time this month I would like to show you two birthday cards that I made for twins, Peter and David. Peter's wife asked me to make a card duo for her husband and brother-in-law's 60th birthday, and I think the Gentlemen die set was just perfect for this occasion.


I'm just saying that the cards are huge, exactly A5 size.

So I cut an A4 watercolour paper (300gsm) in half and blended Weathered Wood ink onto the surface.


Then I spritzed with Speckled Egg Distress Oxide Spray ink.


Then I rubbed diluted white paint onto the surface with a piece of sponge. I like this technique, because with this a mute a little the original colour and it is also a great protection for the colours. When it was dry, I cut the panel a little smaller then inked the edges with Hickory Smoke and Frayed Burlap Archival inks. I finished off the background by splattering it with watered gold paint (Glorious Gold).

Now, the balloons. I cut out for balloons with one of the balloon dies form the Celebration die set. And I coloured them green and blue with the following inks. For the blues I used Tumbled Glass, Salty Ocean and Blueprint Sketch, for the greens Twisted Citron, Mowed Lawn and Rustic Wilderness. I glued the numbers on the balloons and for the numbers I used added the Alphanumeric Label die set. I also added a layer of varnish to the surface. I applied this with a sponge not with a brush, because with brushstrokes I could wipe off the ink from the surface. Just dab the sealing with a sponge gently.


Each gentleman was cut out three times from 300gsm black paper to give them dimension. I glued them together then I added a black paint sealing to the top layer.


For the nameplate, I cut two strips from grey paper, I blended diluted white paint as protection. Then I glued the letters on it. The letters are from the Alphanumeric Label die set too. I inked the edges with Hickory Smoke and Frayed Burlap Archival inks. Then I put a gold paper underneath which frames the name strip nicely.

The stars are from three different die sets: Crescent Moon, Twig&Stump, Swirling Stars.

The bow-ties from the newly released Tailored die set and coloured them with the same ink combinations that I used for the balloons.

There was one thing that was a real challenge in making this card. What should be the string for the balloons? With the original die you can cut a very short string, the balloons wouldn't have reached over the head of the gentlemen. I was a little afraid that a real twine won't stick perfectly. I was thinking about drawing the strings, but then I thought that a flower stalk might be good.  So I looked through all the flower and leaf dies and I found the perfect, the seven leaved die from the Skeleton Leaves set. I just had to cut off the leaves from the stalk.


What I used:

Sizzix Thinlits die, Gentlemen (666286)

Sizzix Thinlits die, Tailored (666289)

Sizzix Thinlits die, Celebrate Colorize (666285)

Sizzix Thinlits die, Alphanumeric Label (664177)

Sizzix Thinlits die, Skeleton Leaves  (663094)

Sizzix Bigz die, Crescent Moon&Stars (658716)

Sizzix Thinlits die, Swirling Stars (663095)

Sizzix Thinlits die, Twig&Stump (666072)

Idea-Ology, Metallic Kraft Stock

Ranger Distress ink (Tumbled Glass, Salty Ocean, Blueprint Sketch, Twisted Citron, Mowed Lawn, Rustic Wilderness, Weathered Wood)

Ranger Distress Archival ink (Hickory Smoke, Frayed Burlap)

Ranger Distress Spray Stain (Speckled Egg Oxide)

etc.


So if you made a masculine card, please don't hesitate to join our March challenge where a randomly selected winner can have a £20 voucher in the Country View Craft Shop! Good luck!


Friday, 1 January 2021

Masculine card with rusty squares

Hello crafty friends and happy New Year!!! We finished a weird year and I hope that you and your loved ones are all in good health. 

It's January 1, and we have a new challenge at the Country View Challenges. The theme is, Use one or more squares and the lovely Corrie chose that who will be your hostess this month.

For this challenge, I created a masculine card with rusty squares.


For making the rusty squares, I cut out squares from 300gsm watercolour paper but the mixed media paper is good too. Then I put a layer of DecoArt Snow-Tex onto them but the Grit-Paste is perfect too. When it was dry, I painted the squares with Burnt Sienna, then I added Burnt Umber here and there with a sponge.  In the end, I spattered with Indian Turquoise which was spritzed with water.

The background was painted with Indian Turquoise first, then I toned back with lighter turquoise and white paints.


I also stencilled tiny squares with Stampers Anonymous Linen stencil by Tim Holtz, then I spattered with white paint and with diluted brown paint.


The letters was cut out with Sizzix Thinlits die, Alphanumeric Classic Lower (664224) by Tim Holtz. I painted them with DecoArt Blue Chiffon first, then I tapped Williamsburg Blue and Uniform Blue. All the edges (letters, background paper) were inked with Ranger Distress Archival inks (Vintage Photo, Ground Espresso).

I also put two Idea-Ology Hex Fasteners into two corners.


If you have a project with squares, please don't hesitate to join our November challenge where a randomly selected winner can have a £20 voucher to spend at the Country View Crafts online shop.

Friday, 1 March 2019

Masculine birthday card with a robot

It's already March and we have a new challenge at the Country View Challenges, called Number and/or Letters. So I decided to show you a birthday card that I made for my dad who became 70 years old on February 22.


I took a 300 gsm watercolour paper and with a brayer, I applied white (White Wash) and grey acrylic paints (Dove Grey, Grey Sky) to the surface.

When it was dry, I glued numbers onto the surface as a repeating pattern. 


I also added some design tape pieces (Butterfly) and since I found the numbers and the design tape too harsh, I toned them back with a little grey paint. I also inked the edges of the card with Vintage Photo.


From different colour papers, I cut out the pieces of the robot and assembled them.

For the text, I used the Crazy Talk stamp set and stamped with Ranger Archival ink (Jet Black).

What I used:

Sizzix Thinlits die, Robotic by Tim Holtz

Sizzix Thinlits die, Gearheads by Tim Holtz

Sizzix Thinlits die, Alphanumeric (3/4") by Tim Holtz

Stampers Anonymous, Crazy Talk by Tim Holtz

Idea-Ology, Design Tape (Butterfly)

Ranger, Multi Medium (Matte)

Raner Distress ink (Vintage Photo)

Ranger Archival ink (Jet Black)

DecoArt Americana paints (White Wash, Dove Grey, Grey Sky)


If you have a project with numbers or letters (or both), please don't hesitate to join our March challenge where you can win a £20 voucher.


With my card, I would like to join the:

Simon Says Stamp Monday Challenge: Vintage/Past times - because the recipient of this card is quite vintage :-)

Simon Says Stamp Wednesday challenge: Anything goes


Thursday, 28 June 2018

A masculine farewell card

Lately, I was asked to make a farewell card for a guy who is originally a history-geography teacher but who is a very skilled cabinetmaker and who often goes to work by bicycle and whose one of the hobbies is photography. And now he is leaving his job.


I had to make a quite big card because 60 people wanted to sign it. So it was an A4 card folded half. 

For the background, I cut out many carpenter tools and I glued them on a thick cardstock which was covered with a layer of gesso after.


Then I painted silver and when it was dry, I smeared diluted black paint on the surface.


What I used:

MFT, Die-Namics Tool Charms

Memory Box, Carpenter Tools die

Stampers Anonymous, Mini Blueprints 3 by Tim Holtz (CMS150)

Stampers Anonymous, Schoolhouse Blueprints by Tim Holtz (CMS230)

Stampers Anonymous, Travel Blueprints by Tim Holtz (CMS148)

Stampers Anonymous, Pen and Pencil by Tim Holtz (CMS072)

Stampers Anonymous, Hashtags by Tim Holtz (CMS183)

Ranger Archival ink, Jet Black

Ranger Distress inks (Hickory Smoke, Black Soot)

Ranger black embossing powder - for the camera and the bicycle

Ranger Distress markers

Ranger Distress Spray Stain (Faded Jeans, Walnut) - for the spatters

Micro Glaze for protection

Pebeo black gesso


With this card, I would like to join the Crop Stop June Link Party: Anything goes


Thank so much for stopping by!!!

Sunday, 5 November 2017

Masculine name banner

Here is an interesting thing about my family. My husband's name contains all the first letters of our names. We are a family of four - of course, I count our little dog, Rozi in it! -and my husband name is Imre.

IMRE: Imre, Monika, Rozi, Eszter

It was a few months ago when I accidentally realised this and in the same time, a name banner came to my mind. I just kept this idea to implement it for my hubby's name-day, for today!


What I used:

Sizzix Framelits Plus Die, Banners (660836)

Sizzix Sizzlits Alphabet Die, Antiqua by Brenda Walton (658337)

Stampers Anonymous, Dots&Floral (CMS220) by Tim Holtz

Stampers Anonymous, Plaid&Nordic (CMS243) by Tim Holtz

Stampers Anonymous, Stripes&Holiday (CMS281) by Tim Holtz

Ranger Distress ink pads (Walnut Stain, Ground Espresso)

Ranger Archival ink pad (Cornflower Blue)

Idea-Ology Loop pins by Tim Holtz

We R Memory Keepers Crop-A-Dile Big Bite

Tonic Studios Paper Distresser by Tim Holtz

Ide-Ology Fasteners, Antique Finishes by Tim Holtz


I attached the banners to each other with loop pins.


By accident, I punched holes to the last banners so I put fasteners to the unwanted holes. 


Happy name-day for my hubby! Happy Guy Fawkes Day for my English friends! Happy Sunday for you!


MentésMentésMentésMentésMentésMentésMentésMentés