Showing posts with label banner. Show all posts

Monday, 30 January 2023

All you need is love - Valentine's Day banner

Let me show you my latest make, a love banner that I created for Valentine's Day. But I'm sure a banner like this can be handy on a wedding anniversary, or first date anniversary as well. 


So, how did I make this? Well, I cut out 18 banners from red paper, using a Sizzix die of Framelits Plus die set, Banners. Then I cut out 18 banners with a one size smaller die from patterned paper. 

I inked the edges of the pink paper with Antique Linen, and the red polka dot with Vintage Photo.


Then I glued the patterned papers to the red bigger banners. I cut out the letters with Alphanumeric Bulletin dies from dark brown paper. I adhered the letters to the banners without the frames.


The next step was to make holes in the upper corners of the banners. For this, I used my Crop-A-Dile, Big Bite Punch (We R Memory Keepers).


I also made two banners with heart in the middle. For this, I chose the Heartfelt Bigz die and one of the hearts which has nearly the same heights as the letters. 


What I used:


Ranger Distress ink (Vintage Photo, Antique Linen)

We R Memory Keeper, Crop-A-Dile Big Punch


I hope you like it! And if you need a banner for Valentine's Day you still have plenty of time.


Friday, 5 June 2020

Feminine birthday banner

Lately, I was a little busy with a big project, which took a few days. My friend who celebrates her birthday at the beginning of June asked me to make her a birthday banner.

After questioning her about the details, I decided to make it in Hungarian. Therefore I had to do 16 banners to make out the BOLGOG SZÜLINAPOT greeting. 

To begin, I cut out 16 banners from white cardstock with the Sizzix Framelits Plus die, Banners. I needed this die set because my banners are quite big. Then I painted gold on both sides. I had to do this since the gold papers are very expensive and I needed plenty. For this, I used the DecoArt Glorious Gold colour.

Then I cut out the one size smaller banners from pattern papers. For this, I used the First Edition floral paper pads, like Floral Pavilion, Pretty Posy, Bella Rose. Unfortunately, all of them are discontinued.

The letters were cut out from gold papers with the Sizzix Bigz die, Sassy Serif Letters.

The only photo I could make about my banner was the one to ask my friend which colour raffia twine she wanted for her banner.


I hope she will take some pictures when she installs this in her garden. And if so, I will show you more pictures of my banner.

And here are the promised pictures:


Monday, 23 March 2020

Polka dot Easter banners

Hello everyone, I'm here with a pair of Easter banners. I got the inspiration for these banners from one of my earlier projects, a polka dot Easter tag.


The pink banner was painted with Victorian Velvet Distress paint, the green one with Bundled Sage. The Victorian Velvet was toned back with a little diluted white (Picket Fence) paint. 

When the panels were dry, I embossed dots on them with Ranger Weathered White embossing powder. For this, I used the Shifter Dots layering stencil.

The bows and the flowers were painted with Tumbled Glass.

I spattered the banners, the bunnies and the flowers with diluted Walnut Stain paint.


What I used:

Sizzix Bigz die, Cottontail by Tim Holtz

Sizzix Thinlits die, Funky Foliage by Tim Holtz

Sizzix Thinlits die, Friendship Words Script by Tim Holtz

Sizzix Thinlits die, Calendar Words Script by Tim Holtz

Stampers Anonymous, Shifter Dots layering stencil

Ranger Distress paints

Ranger Distress Archival inks

Ranger embossing powder

half pearls


I hope you like it!!! Thank you for stopping by!!! Stay at home and enjoy the crafting!!! xx


Friday, 19 July 2019

Christmas banner with St. Nick

Last year I made a few Christmas banners to have wall decorations during the holiday. My favourite was this which was made with Tim's huge Santa stamp from the Festive Sketch set. I was very satisfied with this creation, how it turned out. 

But when I first assembled Tim's latest Sizzix design, the Jolly St. Nick, I knew immediately that this cuteness deserved to be a focal part of a big banner.

So I made this:


The first layer was a red cardstock that I cut out with the Sizzix Framelits Plus die. So you can imagine, this banner is really huge (18x26cm).

With a knife, I distressed the edges, then inked with Walnut Stain Distress ink.

The second layer is one piece from Tim's 12x12" Dapper Paper Stash. With the edges, I did the same process as with the first layer.

The third layer was again a red one - I did the same as with the first layer.

Now the top layer was a 200gsm watercolour paper. For this, I created a polka dot background using Tim's Polkadot stencil (THS068), embossing ink and white embossing powder from Ranger.

Then I inked the paper with Weathered Wood and Tumbled Glass inks. In the end, I applied diluted Antique Linen ink which was added with a brush.

The edges were distressed then and inked with Walnut Stain.


Assembling St. Nick was a little time-consuming but not that difficult that it looked for the first sight. But if you need help, Sizzix explains everything here.

I used red, black and grey cardstocks, except for the white and skin parts. His skin was coloured with Zig Clean markers (Flesh Colour, Pale Pink, Pale Rose). The golden parts were painted with gold acrylic paint.

The word, believe was cut out from the same cardstock that I used for Santa's suit. I cut out twice to make dimension. This word belongs to the Sizzix, Script Holiday Words 1 set.

I also used two Mirrored Stars and Silver Tinsel Twine from the Idea-Ology brand.


I hope you like it!!! Thank you for stopping by!!!


Monday, 17 December 2018

Christmas banner with PaperArtsy stamps

Hello Everyone, I'm here with the second inspirational project for our December challenge at the Country View Challenges. The theme is: Christmas


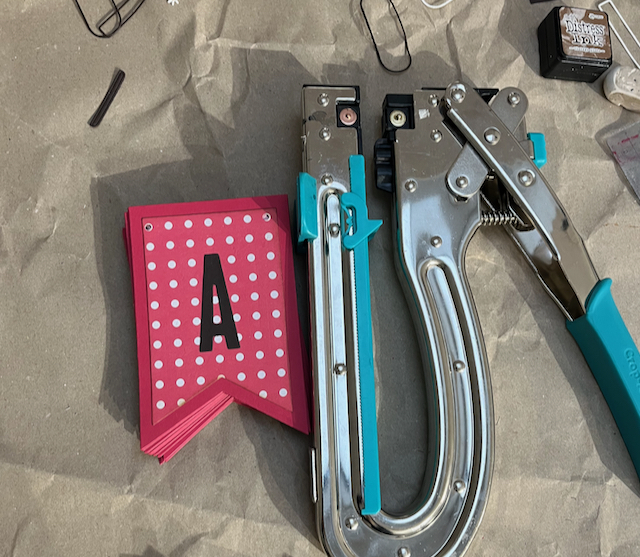
This is a quite big, an 18x24 cm banner without the tinsel. For making this big banner, I had to use the Sizzix Plus Banners Framelits dies.


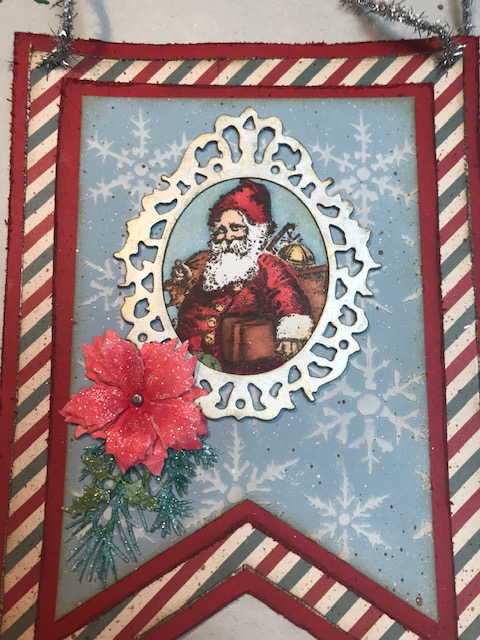
For creating this banner, I stamped the Christmas image onto a Neenah Solar White paper with Tsukineko Memento Rich Cocoa ink. Then following an original Thomas Nast illustration I started to colour my image with Copic Sketch markers. The stamp I used was Hot Pick Xmas 04.


Then I stamped the Merry Christmas text to a watercolour paper with Ranger Archival Potting Soil ink. I cut the text out with scissors and with a brush I adhered watered Antique Linen ink. For this, I used an Antique Linen reinker. The text was part of the Eclectica Scrapcosy 08 set.

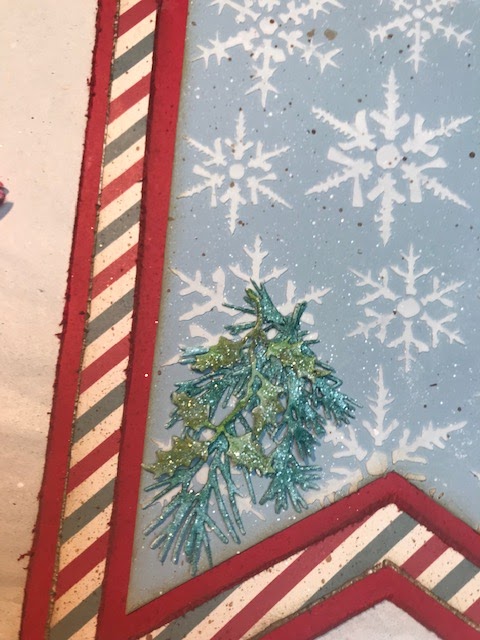
The first layer of this card was a watercolour paper and I stamped the snowflakes randomly for creating a background for my Santa. For this, I used the Noel Plate 4 stamp set and to be able to stamp the snowflakes randomly, I cut the snowflakes stamp apart to get 12 individual snowflake stamps. I stamped the snowflakes with Ranger Archival Watering Can ink.


When I was ready with this, again I aged the paper by adding diluted Antique Linen ink on the surface.


For more ageing, I distressed the edges with a knife and inked the edges with Frayed Burlap Distress ink.

Then I toned back the snowflakes and the Antique Linen colour with a little white paint. For this, I always use the Amsterdam White acrylic paint because there's not too much pigment in the paint, so it doesn't cover and make disappear the image underneath. So it's perfect for fading. 


I spattered the banner with diluted Vintage Photo ink, I dried the ink with my heat tool, then I adhered the images to this banner. 

Then I cut out a second layer from green cardstock and aged the edges.


The next layer was a red cardstock and I stamped the snowflakes randomly around the edges with Ranger Archival Jet Black ink.


I put the banner together, punched two holes for the tinsel twine and added four mirrored stars to the corners of the banner.

Then, for protection, I covered the whole banner with Micro Glaze.


Do you know that this Santa image by Thomas Nast was the first drawing which portrays Santa as a fat, jolly man in a red suit?


If you still have a Christmas project, please don't hesitate to join our challenge where you can win a £20 voucher.


Thank you for stopping by and merry Christmas to you!!!


With my banner, I would like to join the:

Simon Says Stamp Monday Challenge: Warm Winter Wishes

Simon Says Stamp Wednesday Challenge: Christmas

Craft Stamper Magazine: December TIMI challenge


Tuesday, 11 December 2018

Christmas banner with Santa in frame

Hello everyone, here is my second banner, the pair of my earlier banner. Like at my first banner, the first layer of this banner was made by copying and mixing two of my Christmas cards, this and this.


This is quite a big, an 18x26 cm banner.

The 2nd, 3rd and 4th layers were cut out with Sizzix Plus Banners Framelits dies. Spattered with diluted white acrylic paint and Vintage Photo Spray Stain.

The first layer was painted with blue acrylic paint then stencilled with Snowflake layering stencil using Opaque Matte Ranger Texture Paste.

The Poinsettia was coloured with Worn Lipstick and Candied Apple markers, the pine leaves with Evergreen Bough, the holly with Mowed Lawn. Then tapped a little white paint to the edges, when they were dry, I tapped with Glossy Accents and put them to the Clear Rock Candy Glitter jar.

I show you how I built the first layer of my banner.


I glued two mirrored stars to the top corners.


And here is a closer one.


With my banner, I would like to join the Simon Says Stamp Monday Challenge: Warm Winter Wishes


Sunday, 9 December 2018

Christmas banner with Santa

Every year I make some wall Christmas decorations. Last year, for example, I created Christmas rosettes and metallic star ornaments

This year, I made a banner but I think others will coming soon. 


This is a huge, an 18x26 cm banner. For the banners I used the Sizzix Framelits Plus die set, Banners (660836).

I distressed the edges of all the three layers then inked with Frayed Burlap, then spritzed with diluted Vintage Photo Spray Stain.

The first layer was a copy of my wine tag but in a bigger size, this is why I stamped and embossed the pine trees in two rows.

For the text to make a greyish blue colour, I first stamped with the Watering Can ink, dried the ink with the heat gun, then stamped again with Sky Blue ink. For this, the stamping platform is essential.


What I used:

Sizzix Framelits Plus die, Banners

Sizzix Framelits die and stamp set, Holiday Joy

Stampers Anonymous, Festive Sketch (CMS283)

Idea-Ology, Silver Tinsel Twine

Idea-Ology, Mirrored Stars

Ranger Distress ink pad (Frayed Burlap)

Ranger embossing powder (white)

DecoArt Americana paints (Winter Blue, White Wash)

Ranger Archival ink pad (Watering Can, Sky Blue)

Stamping Platform

etc.


With my banner, I would like to join the Simon Says Stamp Monday Challenge: 'B' is for? - banner


I hope you like it!!! Thank you for stopping by!!!

Sunday, 5 November 2017

Masculine name banner

Here is an interesting thing about my family. My husband's name contains all the first letters of our names. We are a family of four - of course, I count our little dog, Rozi in it! -and my husband name is Imre.

IMRE: Imre, Monika, Rozi, Eszter

It was a few months ago when I accidentally realised this and in the same time, a name banner came to my mind. I just kept this idea to implement it for my hubby's name-day, for today!


What I used:

Sizzix Framelits Plus Die, Banners (660836)

Sizzix Sizzlits Alphabet Die, Antiqua by Brenda Walton (658337)

Stampers Anonymous, Dots&Floral (CMS220) by Tim Holtz

Stampers Anonymous, Plaid&Nordic (CMS243) by Tim Holtz

Stampers Anonymous, Stripes&Holiday (CMS281) by Tim Holtz

Ranger Distress ink pads (Walnut Stain, Ground Espresso)

Ranger Archival ink pad (Cornflower Blue)

Idea-Ology Loop pins by Tim Holtz

We R Memory Keepers Crop-A-Dile Big Bite

Tonic Studios Paper Distresser by Tim Holtz

Ide-Ology Fasteners, Antique Finishes by Tim Holtz


I attached the banners to each other with loop pins.


By accident, I punched holes to the last banners so I put fasteners to the unwanted holes. 


Happy name-day for my hubby! Happy Guy Fawkes Day for my English friends! Happy Sunday for you!


MentésMentésMentésMentésMentésMentésMentésMentés