Showing posts with label Advent calendar. Show all posts

Tuesday, 1 December 2020

Advent calendar with Jolly St. Nick by Tim Holtz

It's already December and we have a new challenge over at the Country View Challenges. And I think you will love the theme, which is Christmas - Anything Goes. It's super, isn't it?

For this challenge, I finished an advent calendar.


I started to make this advent calendar two years ago but I imagined a completely other design for it. I wanted to place the Christmas carollers inside but they were too tiny for this huge wooden calendar. But when Jolly St. Nicks was launched and when this year the Toyland die was released too, I knew exactly how this calendar would turn out.


For finding out the final design I also had an inspiration from one of my earlier cards. This was a winter scene with St. Nicks and you can find it here.

About the advent calendar... It was first painted brown, then I added wax to the edges and some parts. For this, I just used a candle. With this technique you can achieve a distress look because the cover paint won't adhere to the waxed area. 

The numbers were cut out with Sizzix Thinlits, 3/4"Alphanumeric dies and I painted them red with Festive Berries Distress paint.

For St. Nicks's suit and for the other red elements, I also used the Festive Berries paint.


What I used:

Sizzix Thinlits die, Jolly St. Nicks by Tim Holtz - for Santa

Sizzix Thinlits die, Toyland by Tim Holtz - for the bag

Sizzix Thinlits die, Santa's Helper by Tim Holtz - for one of the present

Sizzix Thinlits die, Mini Christmas Things - for one of the present

Sizzix Thinlits die, Retro Merry Christmas - for the text

Sizzix Thinlits die, Alphanumeric 3/4" by Tim Holtz - for the numbers

Sizzix Thinlits die, Alpine by Tim Holtz - for the pine  trees

Sizzix Movers&Shapers die, Mini Cardinal&Poinsettia - for the cardinal

Ranger Distress paints (Festive Berries, Bundled Sage, Picket Fence, Peacock Feathers, Cracked Pistachio)

Ranger Archival Distress inks (Vintage Photo, Ground Espresso, Faded Jeans, Hickory Smoke) - for the edges of the painted elements

Ranger Distress inks (Antique Linen, Pumice Stone, Vintage Photo) - for the white cardstock pieces

Idea-Ology, Metallic Paper Stash - for the gold glasses and the belt buckle

etc.


If you have a Christmas project, please don't hesitate to join our November challenge where a randomly selected winner can have a £20 voucher to spend at the Country View Crafts online shop.

And don't forget, today Susan starts an Advent calendar which means that every day a new door, a new offer reveals. The daily offers only available for one day! So hurry up! Don't miss these sales at the Country View Crafts!

Wednesday, 23 November 2016

Advent calendar with Sizzix - Tim Holtz elements

Let me show you my two Advent calendars I had made during the summer for my lovely nephews.


All the elements were tested on the boys, I mean I asked the boys about all the elements before I put them into the calendar. 


Some details:


Slight differences between the two calendars...


An angel in the window...


My favourites:


What I used:


Sizzix Framelits Die and Stamp Set, Holiday Joy (659376) - stamped the trees behind the angel

Stampers Anonymous, Winter Sketchbook (CMS094) -stamped the branch behind the angel


Most of the elements were cut out from chipboard, and most elements were laminated which means I glued more elements together to make depth for them.

If you wish to know... yes, my nephews loved it, mainly the little soldiers!

It 's not a day to make a calendar like these but you still have time until December 1st :-) Happy crafting!


Tuesday, 6 October 2015

Wooden Halloween calendar decorated with Tim Holtz dies

One morning when Eszter was trying to wake up she told me that she had fed up with school. "I am so tired and the Autumn Holiday is so far away" - she told me. Tricksy, she also told me that there was nothing to motivate her... Oh, catastrophe! 

And even though we don't celebrate Halloween (I mean not that way like in the US) I decided to make a Halloween calendar for her to give her motivation to wake up every morning :)

So after Eszter's outburst I rushed to the local craft store to have a look what they had. From the 4 types of Advent calendar I chose the house shaped one because I just had the idea to make a black haunted house with orange windows. 

Now, let me introduce my haunted house calendar that I made with one week hard work :)


Since I made this for my girl I didn't want to make it too scary. 


Well, this was the basic I have bought in a craft store.


The structure was painted black.


Following a randomised design I painted some drawers orange. My idea was that the lights are on in some windows (orange drawers) and off in others (black drawers).


Then I started to sand every edges! Really every! All the 24 drawers and the structure! I hated it in the end :-)


But it was not the end because I rubbed DecoArt patina onto the sanded edges.


And finally I could decorate it with Tim Holtz dies - the numbers, the cobwebs, the skull and the cat.


For the cat, I glued 6 chipboard shapes to give some dimension.


The cat and bat are silvery to look like ghosts.


With this calendar I would like to enter to the Monday Challenge of the Simon Says Stamp blog - the AUTUMN IS IN THE AIR.


What I used:

Sizzix Sizzlits Alphabet Die, Spooktacular by Tim Holtz (658714)

Sizzix Sizzlits Die, Cobwebs by Tim Holtz (658713)

Sizzix Movers&Shapers Die, Mini Skull&Bat by Tim Holtz (657458)

Sizzix Bigz Die, Raven&Scaredy Cat by Tim Holtz (656928)

acrylic paints

acrylic medium


Saturday, 8 December 2012

Advent calendars from the Villeroy&Boch


Perhaps, you know, that I live in Luxembourg, and perhaps, you know, that the Villeroy&Boch is a Luxembourgish-born company, or at least the Boch-part (Villeroy was German). In 1767 the Boch brothers moved to Septfontaines (Luxembourg) from Audun-le-Tiche (France) and founded a company. They named it “Jean-Francois Boch et frères”. 

But I don’t want to write the history of the Villeroy&Boch company right now, I just wanted to tell you the reason of “advertising” a company and it’s products.

The point is that I’m a huge fan of advent calendars and I have seen two marvellous pieces yesterday evening in the shop-window of the Villeroy&Boch, when we were walking in the city centre of Luxembourg.

The first is for the children and it’s made from wood. You can hide each day a surprise for the little ones in a drawer.


The second one is for the adults and it’s made from china. Every day you can hang a Christmas ornament to the tree until Christmas arrives. 


Monday, 19 November 2012

Kids’ room in Christmas mood

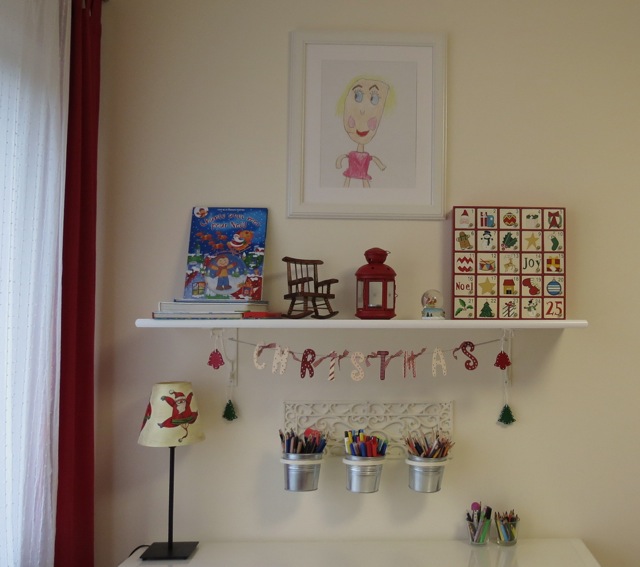
My daughter’s room was the first place to get a Christmas decoration. Like every year I place the Pottery Barn Kids Winter Wonderland quilt on her bed with the decorative pillows. It’s so beautiful!


And what's beneath the cover?


This wooden advent calendar is my other favourite and it was not me who made it. I have bought it at Ebay. (But you can see mine here.)


Each year I print a picture of a vintage postcard and I insert that into a frame by IKEA. 


Three years ago...


And this year


Three years ago I put a real antique postcard into a smaller IKEA frame and I hung a Christmas wooden garland under.


Here are another alternative using the Christmas garland from this year. I could also display my salt dough decorations.


And from a further perspective you can admire Eszter's self-portrait.


Wednesday, 7 November 2012

Handmade Advent calendar with decoupage technique


I made this Advent calendar for my 4 years old nephew, Zsigmond (Sigismund). 


For this I bought 24 white zinc buckets in a craft shop. They are so tiny, their height is not more than 6 cm, and the diameter above is only 6.5 cm. Luckily in the same shop I found a pocket of paper napkins with Advent motives. Although not all the 24 numbers occur on the napkin but luckily all the numbers are present from 0 to 9 so it is possible to cut out and put together the missing numbers for the 24 days.


Beside the numbers I also cut out the bigger and the smaller pictures. I glued the big ones on the opposite side and the small pictures all around the buckets. At the end I put two coats of lacquer on the surface.


You can put the buckets on a shelf but they take up too much space like this. So instead I twined  a green and a red raffia and I tightened them between two screws. After I tied each buckets on the twined raffia rope.

Some buckets with numbers:


The other side of the buckets:


What I used:

- 24 white zinc buckets (height 6 cm)
- 3 paper napkins with Advent motives
- decoupage glue and decoupage flat brush
- lacquer and normal brush