Showing posts with label felt ornaments. Show all posts

Saturday, 23 May 2020

Totoro

Tomorrow will be my daughter's name-day. I'm sure I've already told you that she is a huge fan of Japanese cartoons. Wolf Children, Ponyo, Pokémon, Fairy Tail and Totoro are some of her favourite cartoons. 

Two years ago I had made a Fairy Tail cake with a blue cat for her birthday but I wasn't satisfied with it hence I'm sure I didn't share it with you here. 


This time she chose Totoro so I've made a Totoro felt ornament, a Totoro keychain and a Totoro cake for her name-day.

Here they are:


I hope she will like it!!! 

For the Totoro felts, I found a pattern on this blog. I didn't use all the elements of his plushie and I changed the sizes too.

Sunday, 1 February 2015

Polka dot felt Easter ornaments

I had made last year those polka dot salt dough decorations what I used as a model this year for these felt ornaments.


In one of my earlier post I showed you how to embroider the felt eggs but this time I would like to share you a trick how to make dot patterns which helps embroidering. 

For this I took an ink pad (I used Tsukineko Memento) and an object to stamp a little circle, for example a cap of a marker or a holder of a cake candle.


I used a candle holder :-)


For cutting the eggs I used scissors but for the bunny I used my Sizzix Big Shot and Tim Holtz Bigz Die, the Easter Elements.


Friday, 30 May 2014

Felt black rabbit


I made this rabbit to order, but the one who gave the order was one of my friends :-) Because of the same design it is the cousin of the white Easter rabbit


Saturday, 10 May 2014

Felt flowers for Mother's Day


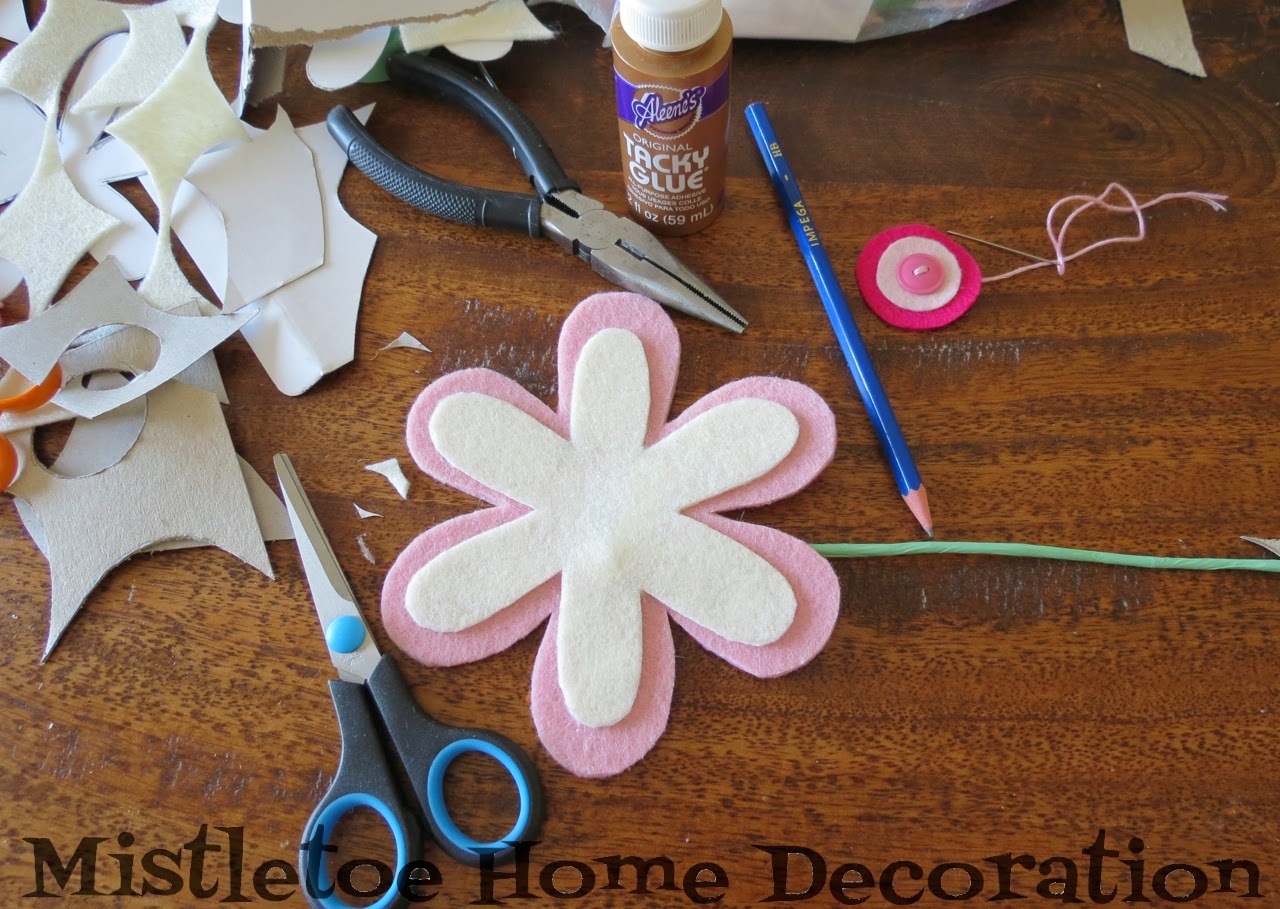
In my creative workshop we made these flowers with the kids for Mother's Day.


How to do it:


1. Take an aluminium wire and cover it with green washi tape.


2. Find a flower template on the internet or draw one by yourself. 

3. Draw the template on a cardstock.

4. Draw the final template on the felt.

5. Pierce a hole in the middle of the big flower and pull the wire out of the hole.

6. Bend the end of the wire (those part in the flower head).

7. Glue a smaller felt flower on the big flower. (With this you hide the wire)


8. From thinner felts cut out circles.

9. On the smaller circle sew a button. Glue this on the felt too.

10. Cut out a green circle and glue it on the back.


Sunday, 2 March 2014

Easter felt ornaments for kids

I have prepared these felt ornaments for my next creative workshop. The kids can make them with gluing. This was me who cut out the 3 mm thick felt because it was very hard to cut, for me too.


But they have to draw and after cut out the animal's eyes, the  wings, the beak etc... as well as the dots of the eggs from the thin felts.  


At the end the children will make holes with a puncher (Crop-A-Dile) to hang them up. 


Tuesday, 17 December 2013

Mistletoe felt decoration

As you know, the name of my blog is Mistletoe Home Decoration and I often make felt decorations, so many of you find me - after using the google search - as someone who makes mistletoe felt decoration. But unfortunately until now I've never prepared it.

It's never too late to rectify this situation :-)  


After drawing the line of the pattern and cutting it out, I embroidered dots on both sides. You know me, I love dots on felt ornaments, but in this case these dots are not just decoration, they are the berries.


Wednesday, 27 November 2013

Red felt Christmas stockings with dots

Décorations de Noël en feutrine - soulier rouge à pois bleu


I can't stop making felt decorations and inventing new designs :-) 

Here are my latest products:


Felirat hozzáadása


Monday, 25 November 2013

Felt Christmas tree for children

Sapin de Noël en feutrine pour les enfants


This is an easy craft idea for kids just like my felt owl decoration. That's me who cut out the Christmas tree shape from a 3 mm thick felt. 


But the kids have to draw the circles on the 1mm thick felt with using the lid of a felt-tip pen (with what else? hahaha) and they have to cut them out and glue them to the tree shape.


And here is my daughter's Christmas tree :-)


Thursday, 21 November 2013

Embroidered felt snowman

Décorations de Noël en feutrine - bonhomme de neige

Here in Luxembourg the snow has arrived! For Eszter the first thing was to build a snowman after school :-)


I took a liking to make a snowman too. 


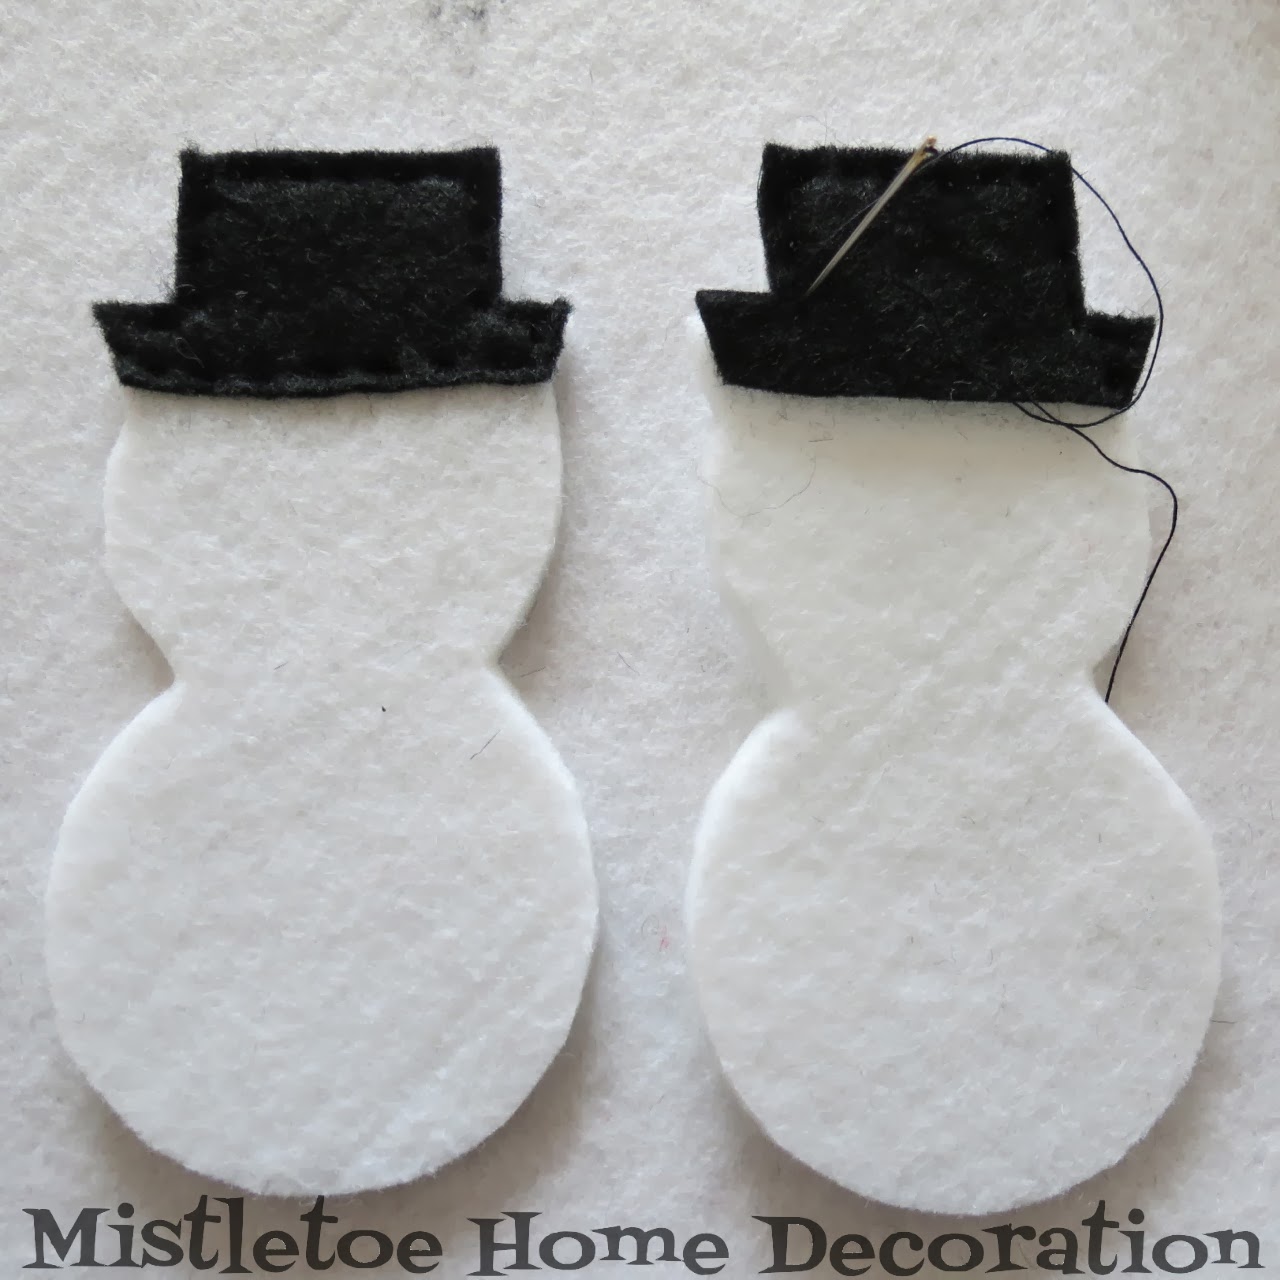
And here are the pictures and some explanation of the preparation:

1. First of all I made my own template using a salt shaker and a lid of a vitamin bottle.


2. I cut it out.


3. I drew the shape twice on a white felt.


4. I cut them out.


5. I drew the hat on a black felt with the original snowman template.


6. I sewed the black hat on the white shape.


7. I embroidered the eyes, the nose, the mouth and the buttons.


8. I stitched together the two part and with my Crop-A-Dile I made a hole in the hat.

9. In the and I put a string in the hole.

10. I put a "scarf" around his neck :-)


Monday, 18 November 2013

Embroidered felt Christmas decorations - red circles with dots

Décorations de Noël en feutrine - ronds rouges à pois

I made these circles (or we can name it globes) for those who insist on red because for them the red symbolize the Christmas. They are many and I'm also one of the member of this group.


Some pictures of the preparation:


I draw little circles on the felt for the dots

These are the reverse sides


Friday, 8 November 2013

Embroidered felt ornament with dots - Christmas stocking

Décorations de Noël en feutrine - soulier à pois

November… windy, rainy and grey. It's better stay at home and make something nice, something heartwarming.

I continue producing felt decorations.  My first ornaments at this season are my favourites, the Christmas stockings. But this time I made a red version.


My other blogpost on this subject:


Tuesday, 22 October 2013

Felt owls for children

Chouettes en feutrine pour les enfants

Luckily, nowadays we could invite many children to our home for playdates. Normally I leave my daughter with her friends to play freely. But I thought that it would be a nice, few minutes program for them to make some souvenirs what they could bring home. 

So I have bought felt sheets in many colours (3 mm thick for the body and 1 mm thick for the other parts - beak, eyes, wings) and I have decided to cut out owl figures. The children don't have to do anything but choose a design and glue the parts.

They can choose from these types:


and from these:


And here is the tutorial:

1. Print an owl pattern from Internet (I printed two and I mixed them).

2. Cut it out and copy the parts on a paperboard.


3. Draw the parts on the felts.


4. Cut out the forms.


Some extra tip: Put them into a plastic bag separately. Like this the parts won't mix up.


When the children are over here, I just give them a little pouch and a felt glue to make their own owls. The felt owl making is a good program at a birthday party too.


My other blogposts on this subject: